RN에서 tailwind 사용 시 custom font 적용하기
배석현 책임
RN tailwind custom font family 적용
Github Link: https://github.com/jaredh159/tailwind-react-native-classnames
무스마에서 RN 개발 시 Tailwind를 사용한다. 그 중에 사용하는 라이브러리는 https://github.com/jaredh159/tailwind-react-native-classnames 인데, 해당 라이브러리 사용할 경우 custom font family를 적용하는 방법에 대해서 정리했다.
- 모듈 설치
- tailwind-react-native-classnames 모듈 이름이 변경 되었다. tailwind-react-native-classnames가 이미 설치 되어 있으면 먼저 제거한다.
- 그 후 변경된 모듈 twrnc 을 설치한다.
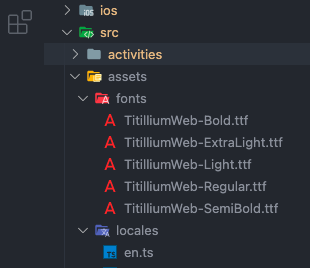
>yarn remove tailwind-react-native-classnames >yarn add twrnc - 폰트 파일을 적절한 위치에 넣는다. 보통 ./src/assets/fonts 폴더를 만든 후에 해당 폴더에 폰트 파일을 넣는다.
- 폰트 파일 경로를 프로젝트가 알 수 있도록 react-native.config.js 파일을 작성한다.
// 파일 위치 : 프로젝트 루트
// 파일 명 : react-native.config.js
module.exports = {
  project: {
    ios: {},
    android: {},
  },
  assets: ['./src/assets/fonts'],
}
- 다음 명령어를 터미널에서 실행해서 폰트가 android와 iOS에 적용 되도록 한다.
>react-native link
info Linking assets to ios project
info Linking assets to android project
success Assets have been successfully linked to your project
- tailwind.config.js 파일에 fontFamily를 추가해 준다.
// 파일 위치 : 프로젝트 루트
// 파일 명 : tailwind.config.js
module.exports = {

	// 이상 생략

  theme: {
    fontFamily: {
      TitilliumWebBold: ['TitilliumWeb-Bold'],
      TitilliumWebExtraLight: ['TitilliumWeb-ExtraLight'],
      TitilliumWebLight: ['TitilliumWeb-Light'],
      TitilliumWebRegular: ['TitilliumWeb-Regular'],
      TitilliumWebSemiBold: ['TitilliumWeb-SemiBold'],
    },
		// 중간 생략
	}
	// 이하 생략
}
- fontFamily 를 추가할 때 규칙은 다음과 같다.
// 파일 위치 : 프로젝트 루트
// 파일 명 : tailwind.config.js
module.exports = {

	// 이상 생략

  theme: {
    fontFamily: {
      tailwind에 자동완성에 보여줄 이름 : ['확장자를 제거한 폰트 파일명'],
    },
		// 중간 생략
	}
	// 이하 생략
}
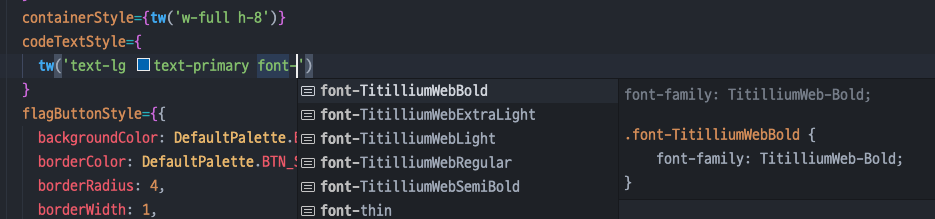
- vscode를 재 실행해준다. tailwind 를 작성하면 다음과 같이 자동 완성되어 보이게 된다.