C# 그림 전환하기
성은기 책임
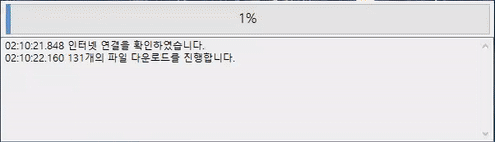
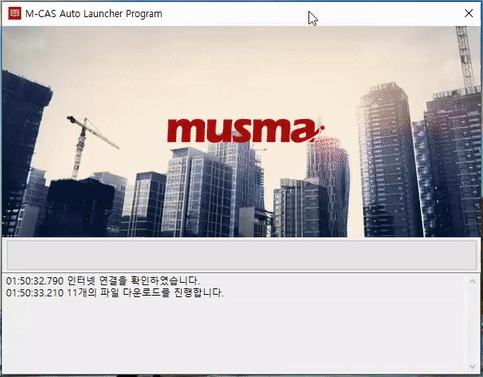
M-CAS Auto 런처
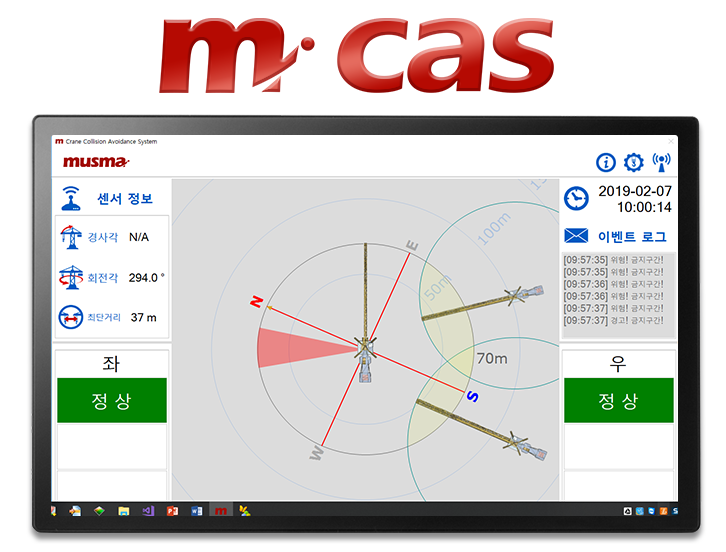
산업안전을 위한 무스마 라인업인 크레인 충돌방지 모니터링 시스템 M-CAS Auto
지난 8월, M-CAS Auto에는 프로그램을 자동으로 업데이트 하는
런처 프로그램이 제작되었습니다.
해당 프로그램이 실행되면 자동으로 무스마 서버에서 최신버전으로 업데이트 합니다.
기능 구현을 하고 나서
프로그레스바 색상이라도 좀 바꿨는데
요렇게까지 하니 너무 없어보입니다.
UI 디자인 유독 신경쓰였습니다.
디자이너가 아니기에 늘 UI에 한계를 느끼지만
그래도 윈앱 중에 예쁜 축에 속하는 닷넷으로 만들다보니
개인적으로 디자인에 욕심이 생깁니다.
C# 그림 전환하기
무스마 홈페이지를 보고 있으니
한 10년 전에 asp로 소스로 만들었던
메인 페이지에 이미지 페이드 인/아웃 을
넣었던 것이 기억나더라고요.
페이드인, 아웃되는 GIF 파일 하나 넣을까 하다가
간단하게 구현하기로 결심했습니다.
//PictureBox Paint
private void PictureBox1_Paint(object sender, PaintEventArgs e)
{
    Bitmap bitmap = new Bitmap(image1);
    Bitmap bitmap2 = new Bitmap(image2);

    float[][] matrixItems ={
        new float[] {1, 0, 0, 0, 0},
        new float[] {0, 1, 0, 0, 0},
        new float[] {0, 0, 1, 0, 0},
        new float[] {0, 0, 0, opacityvalue1, 0},
        new float[] {0, 0, 0, 0, 1}};

    ColorMatrix colorMatrix = new ColorMatrix(matrixItems);
    ImageAttributes imageAtt = new ImageAttributes();
    imageAtt.SetColorMatrix(colorMatrix,ColorMatrixFlag.Default,ColorAdjustType.Bitmap);

    float[][] matrixItems2 ={
        new float[] {1, 0, 0, 0, 0},
        new float[] {0, 1, 0, 0, 0},
        new float[] {0, 0, 1, 0, 0},
        new float[] {0, 0, 0, opacityvalue2, 0},
        new float[] {0, 0, 0, 0, 1}};

    ColorMatrix colorMatrix2 = new ColorMatrix(matrixItems2);
    ImageAttributes imageAtt2 = new ImageAttributes();
    imageAtt2.SetColorMatrix(colorMatrix2,ColorMatrixFlag.Default,ColorAdjustType.Bitmap);

    e.Graphics.DrawImage(bitmap, new Rectangle(0, 0, 600, 265), 0.0f, 0.0f, iWidth, iHeight, GraphicsUnit.Pixel, imageAtt);
    e.Graphics.DrawImage(bitmap2, new Rectangle(0, 0, 600, 265), 0.0f, 0.0f, iWidth, iHeight, GraphicsUnit.Pixel, imageAtt2);
}

//Timer1
//이미지 갱신 매트릭스 변수 조절
private void Timer1_Tick(object sender, EventArgs e)
{
    if (opacityvalue1 != 0 && opacityvalue2 != 1)
    {
        if (opacityvalue1 < 0)
        {
            opacityvalue1 = 0.0f;
        }
        if (opacityvalue2 > 1)
        {
            opacityvalue2 = 1.0f;
        }
        else
        {
            opacityvalue1 = opacityvalue1 - 0.1f;
            opacityvalue2 = opacityvalue2 + 0.1f;
            pictureBox1.Invalidate(true);
        }
    }
}

//Timer2
//이미지 갱신 타이머
private void Timer2_Tick(object sender, EventArgs e)
{
    if (Page == 1)
    {
        image1 = Properties.Resources._1;
        image2 = Properties.Resources._2;
        Page++;
    }
    else if (Page == 2)
    {
        image1 = Properties.Resources._2;
        image2 = Properties.Resources._3;
        Page++;
    }
    else if (Page == 3)
    {
        image1 = Properties.Resources._3;
        image2 = Properties.Resources._4;
        Page++;
    }
    else
    {
        image1 = Properties.Resources._4;
        image2 = Properties.Resources._1;
        Page = 1;
    }
    opacityvalue1 = 1.0f;
    opacityvalue2 = 0.0f;
}
System.Drawing.Imaging에 있는 ColorMatrix를 이용해서 구현했습니다.
타이머1은 투명도 처리, 타이머2는 페이지 처리를 맡았습니다.
이대로 끝내기는 아쉬워
세세한 처리까지는 못해도
픽쳐박스를 클릭할 때
다음 이미지로 갱신되게
페이지 전환 클릭 이벤트 정도 추가했습니다.
//이미지 클릭 이벤트 처리
CancellationTokenSource cts = null;
private void PictureBox1_Click(object sender, EventArgs e)
{
    if (cts != null)
    {
        cts.Cancel();
        cts = null;
    }

    cts = new CancellationTokenSource();
    CancellationToken token = cts.Token;
    timer2.Stop();

    if (opacityvalue1 != 0 && opacityvalue2 != 1)
    {
        Page--;
    }

    if (Page == 1)
    {
        image1 = Properties.Resources._1;
        image2 = Properties.Resources._2;
        Page++;
    }
    else if (Page == 2)
    {
        image1 = Properties.Resources._2;
        image2 = Properties.Resources._3;
        Page++;
    }
    else if (Page == 3)
    {
        image1 = Properties.Resources._3;
        image2 = Properties.Resources._4;
        Page++;
    }
    else
    {
        image1 = Properties.Resources._4;
        image2 = Properties.Resources._1;
        Page = 1;
    }
    opacityvalue1 = 0.0f;
    opacityvalue2 = 1.0f;
    pictureBox1.Invalidate(true);

    var task1 = Task<int>.Run(() => Task.Delay(timer2.Interval, cts.Token).Wait());
    task1.ContinueWith(x =>
    {
        timer2.Start();
    }, TaskScheduler.FromCurrentSynchronizationContext());
}
살짝 구구절절한 느낌 있지만
원하던 대로 느낌은 구현했습니다.
이미지 페이드 인 아웃이 필요할 때
자주 사용할 수 있을 것 같습니다.
물론 더 나은 방법을 찾으면 업그레이드 해 나갈 생각입니다.
감사합니다.