FCM 알아보기
정창현 주임
FCM 알아보기
들어가기 전..
이번 프로젝트에서 앱에서 알람을 보내기 위해, FCM 를 사용하게 되었습니다.
구글링과 공식문서를 보면서 테스트 앱을 만들고, FCM을 태스트 하였는대, 설정 부분에서 몇몇 부분들이 재대로 설명되어 있지 않거나 생략이 되어있어
나중에 또 다시 FCM 기능을 사용할때 참고하기 위해서 이렇게 글을 작성하게 되었습니다!.
목차
소개
모바일 애플리케이션에서 효과적인 푸시 알림 전송은 사용자들과의 소통 및 앱 참여도를 높이는 중요한 요소입니다. Firebase Cloud Messaging(FMC)는 이러한 목적으로 널리 사용되는 강력한 클라우드 기반 메시징 솔루션입니다.
이번 글에서는 FCM의 기본 개념과 함께 어떻게 FCM을 활용하여 효과적인 푸시 알림을 전송하는지에 대해 알아보겠습니다.
FCM 이란 ?
Firebase Cloud Messaging(FMC)는 Google의 Firebase 플랫폼에서 제공하는 메시징 서비스로, 서버에서 클라이언트 앱으로 메시지를 안정적으로 전달할 수 있는 방법을 제공합니다. 이를 통해 사용자에게 알림, 업데이트 및 맞춤형 내용을 실시간으로 전송할 수 있습니다.
FCM의 주요 기능
- 다양한 푸시 알림 형식: 단순 텍스트, 이미지, 액션 버튼 등 다양한 형식의 푸시 알림을 지원하여 알림의 가시성과 사용자 경험을 향상시킵니다.
- 대상 지정: 주제(topic) 구독, 기기 등록 토큰을 사용하여 메시지를 특정 그룹 또는 개별 기기로 전송할 수 있습니다.
- 백그라운드 데이터 동기화: FCM을 사용하면 앱이 백그라운드에 있는 동안에도 데이터를 동기화하거나 작업을 수행할 수 있어 사용자 경험을 향상시킵니다.
푸시 알림 전송 방법 ( Spring boot + android )
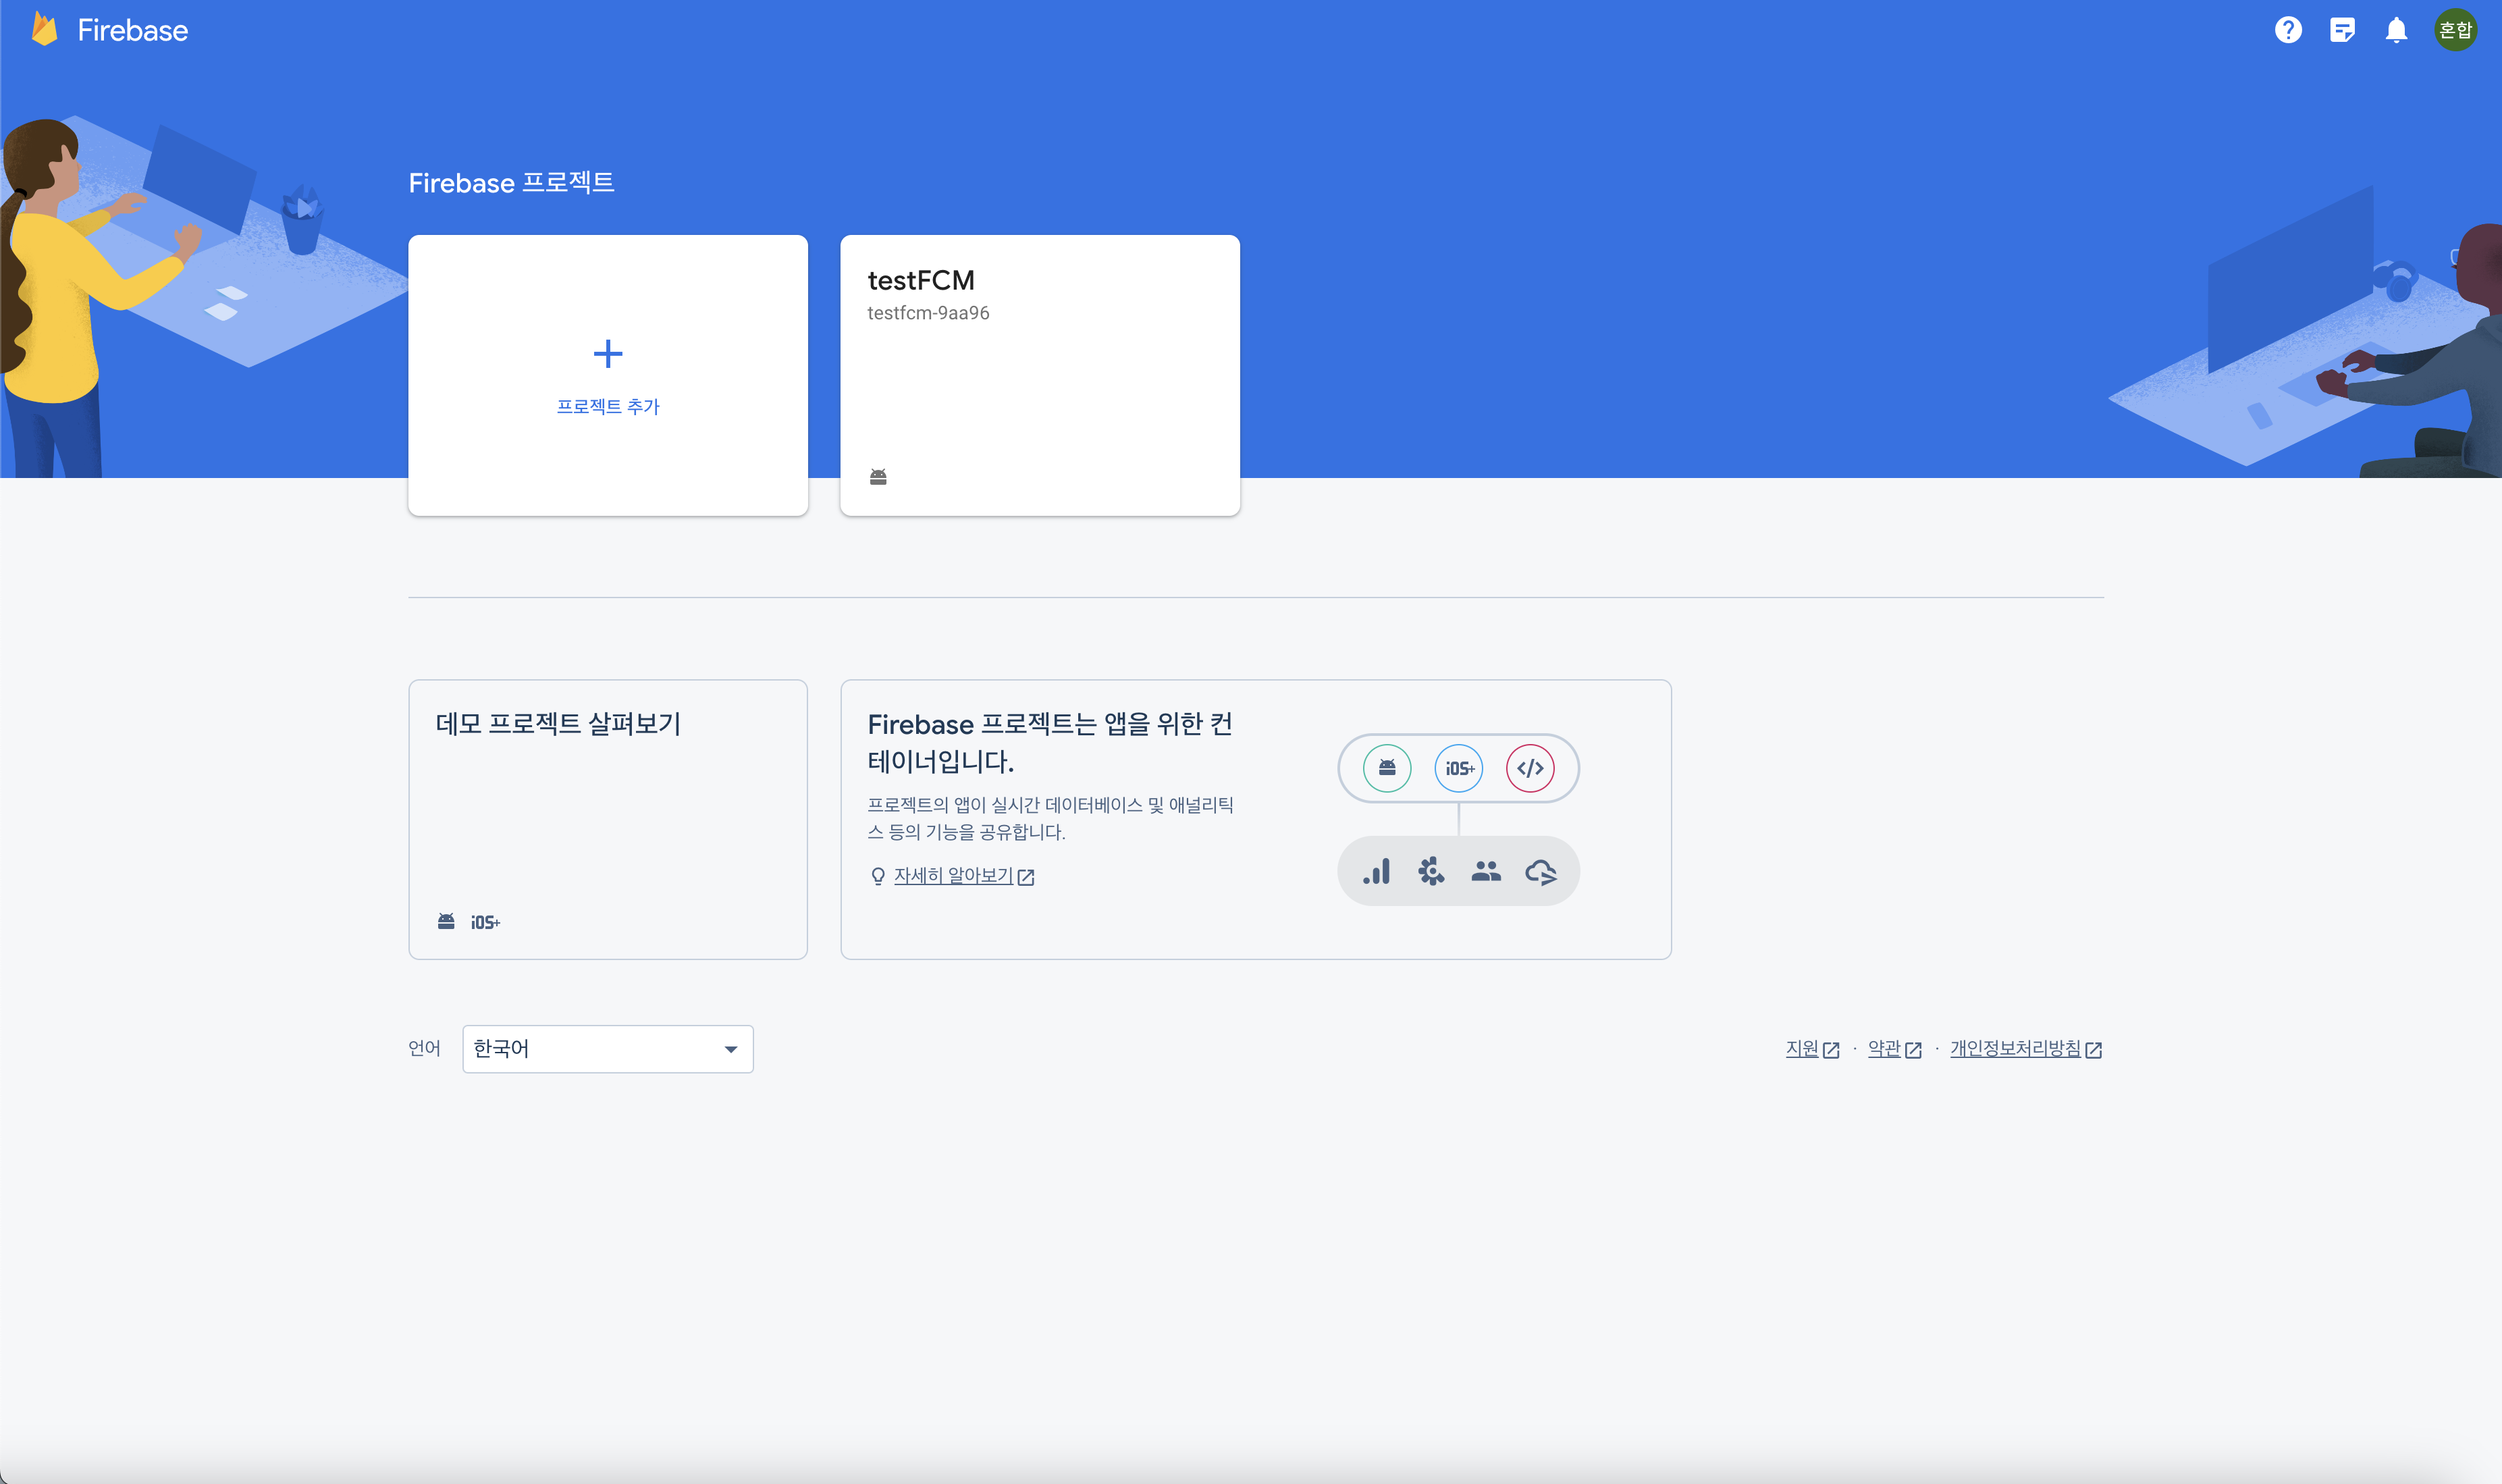
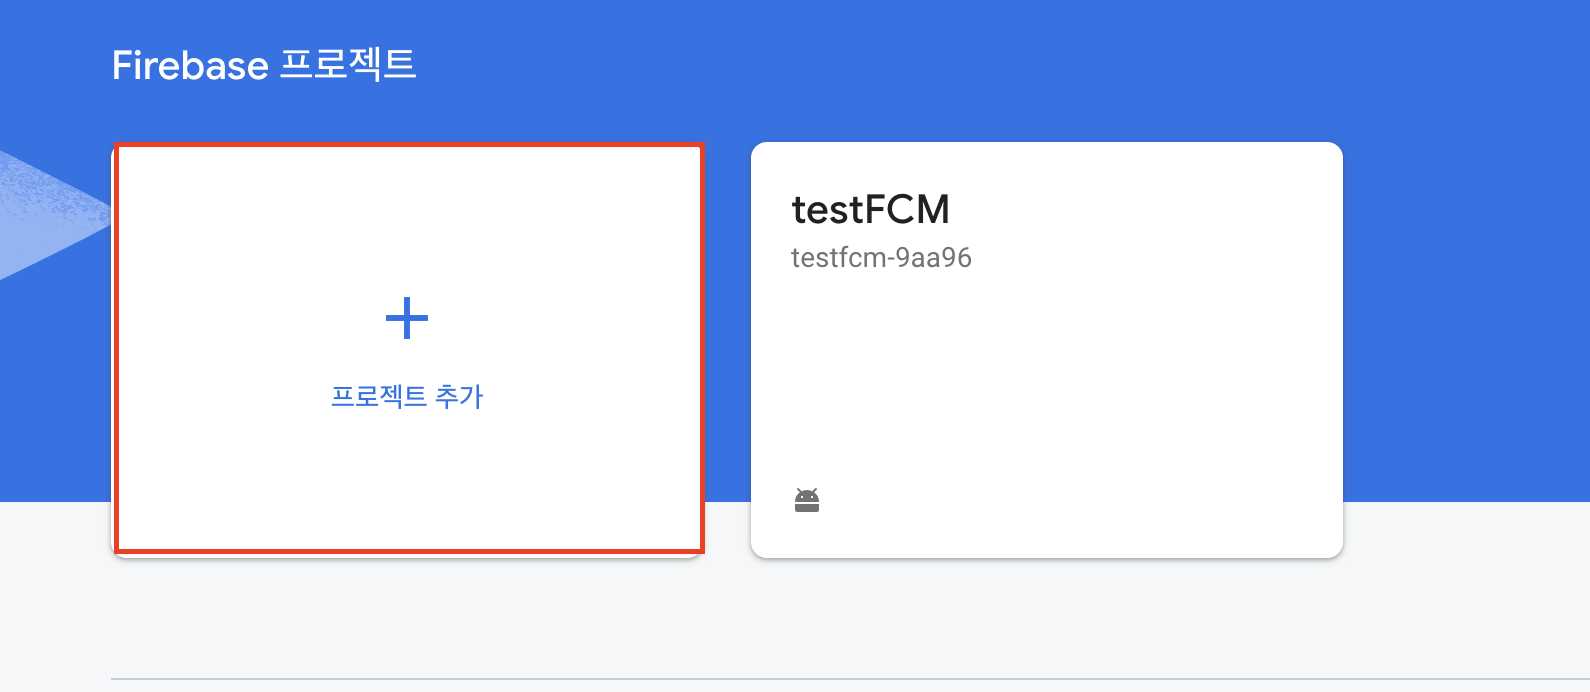
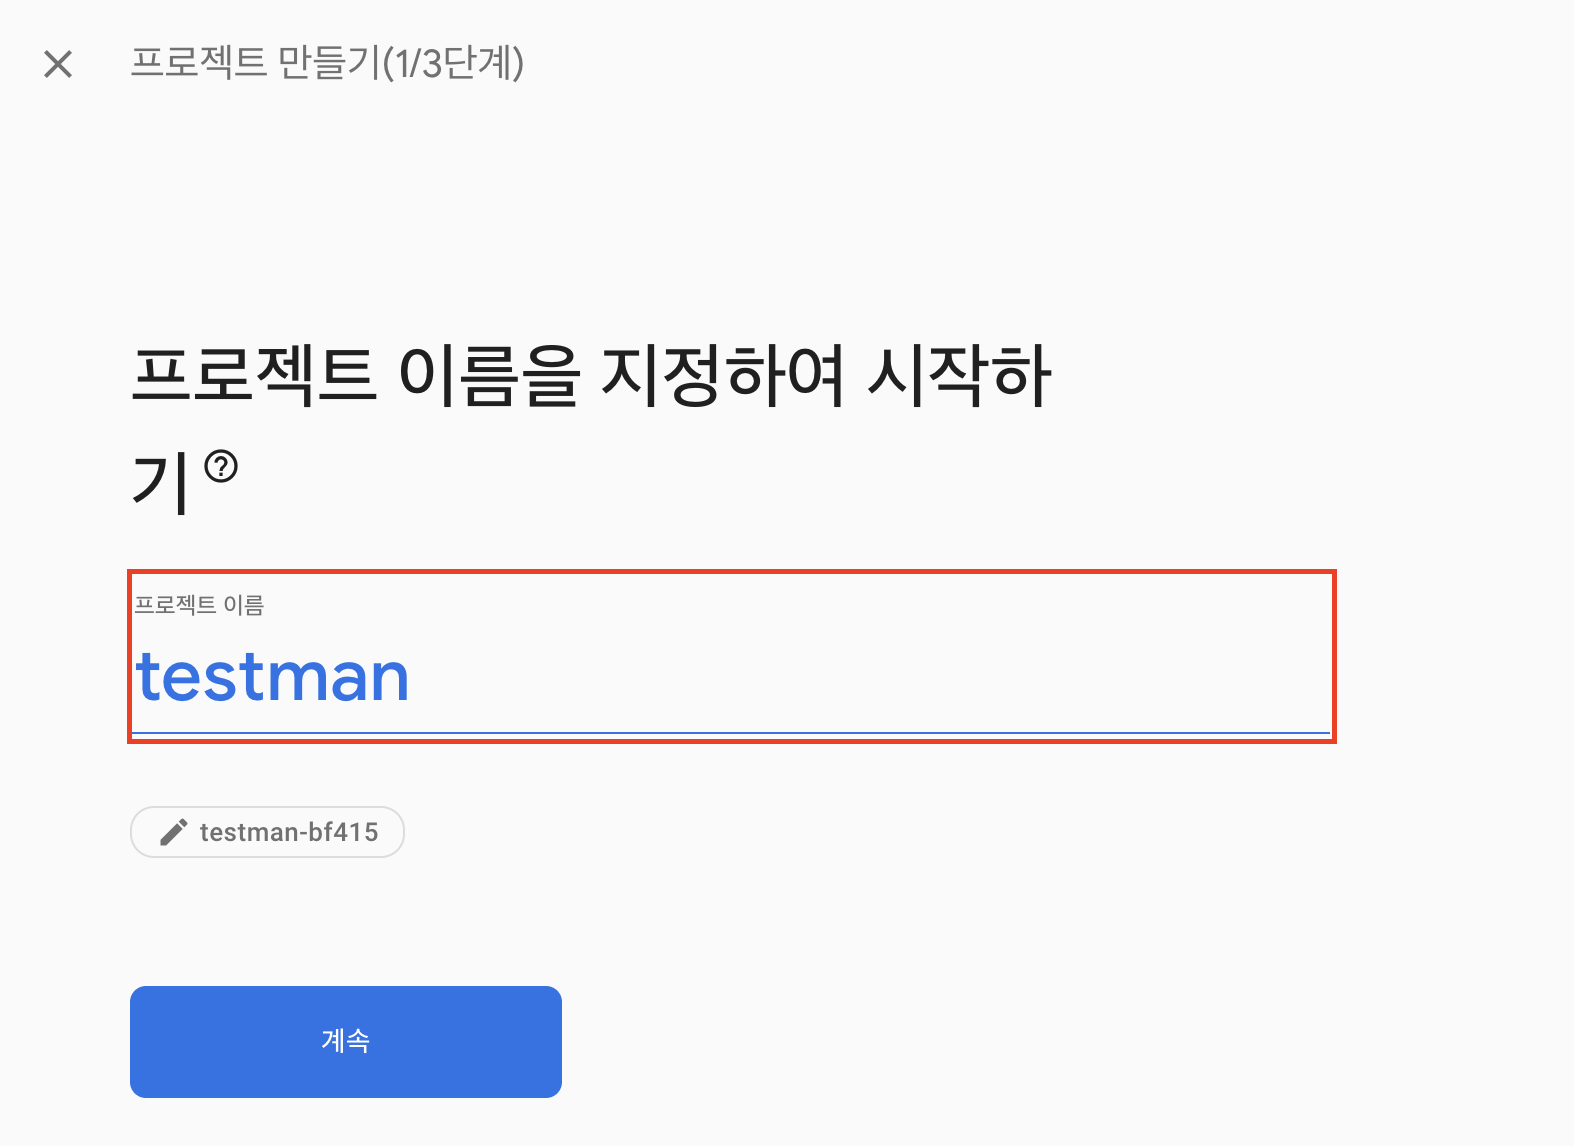
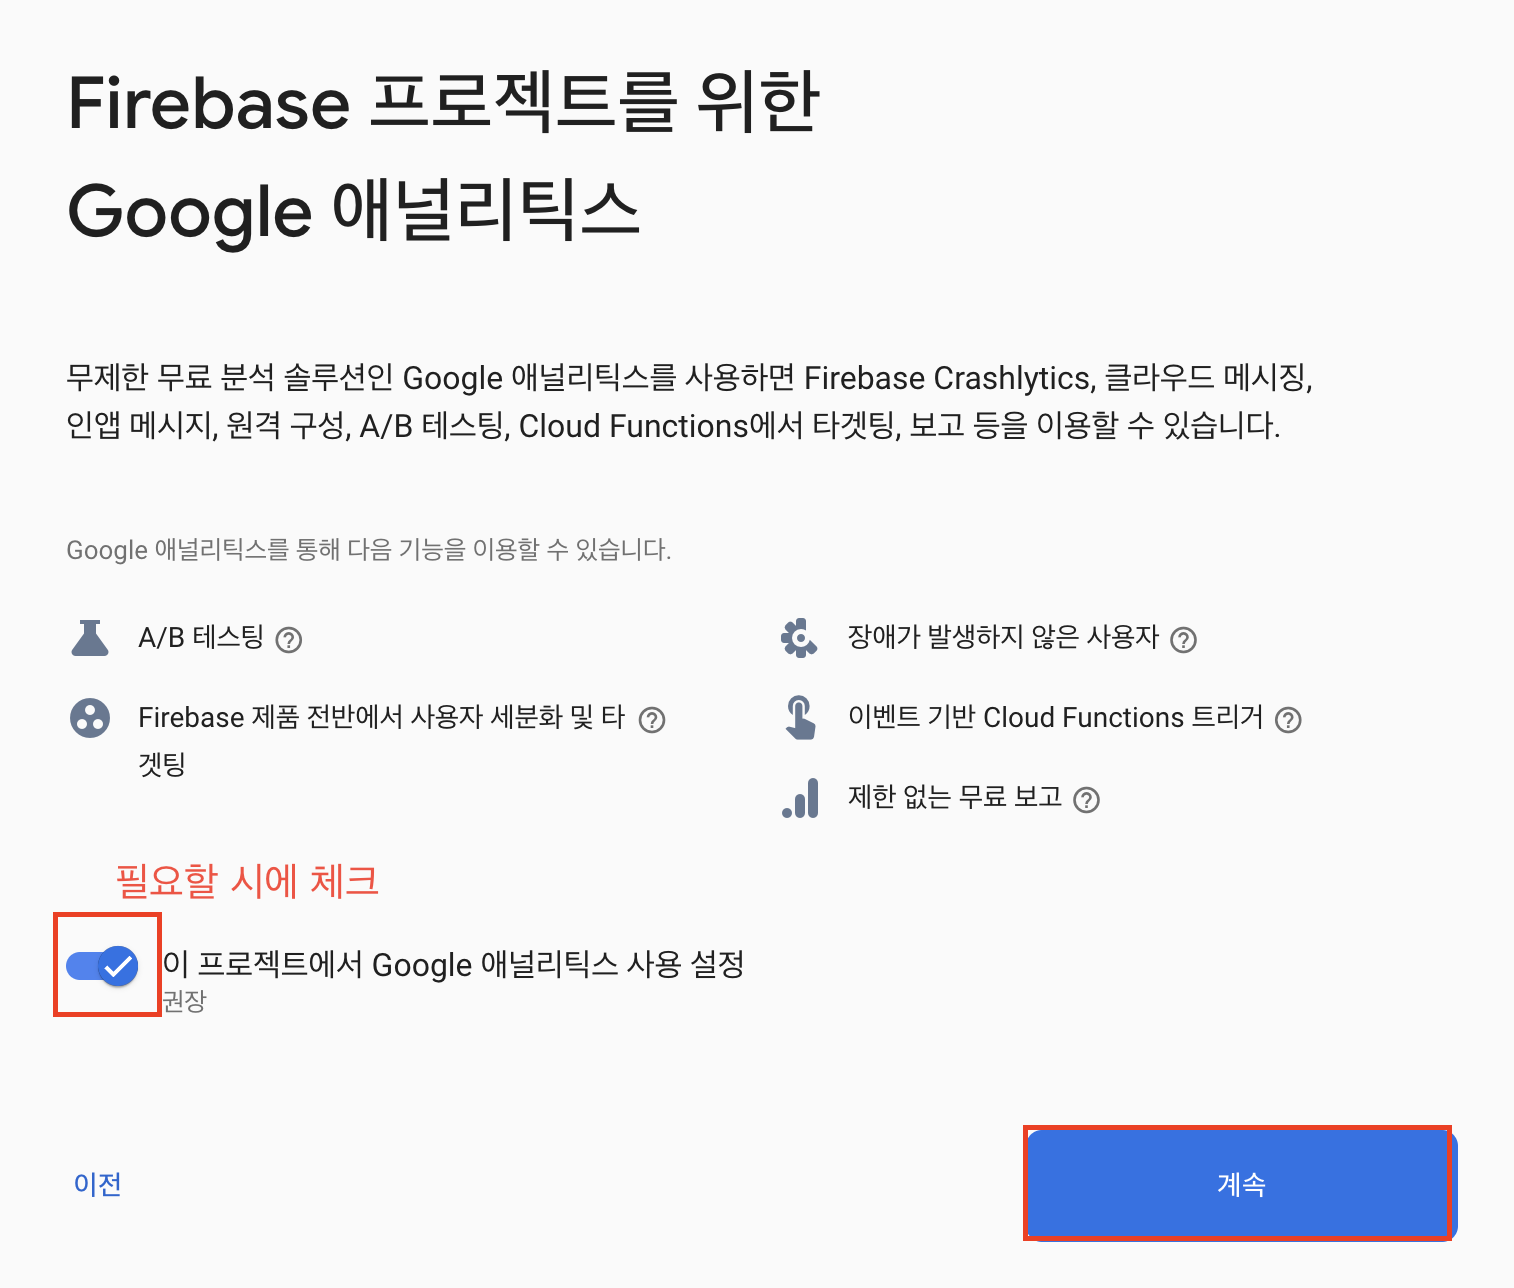
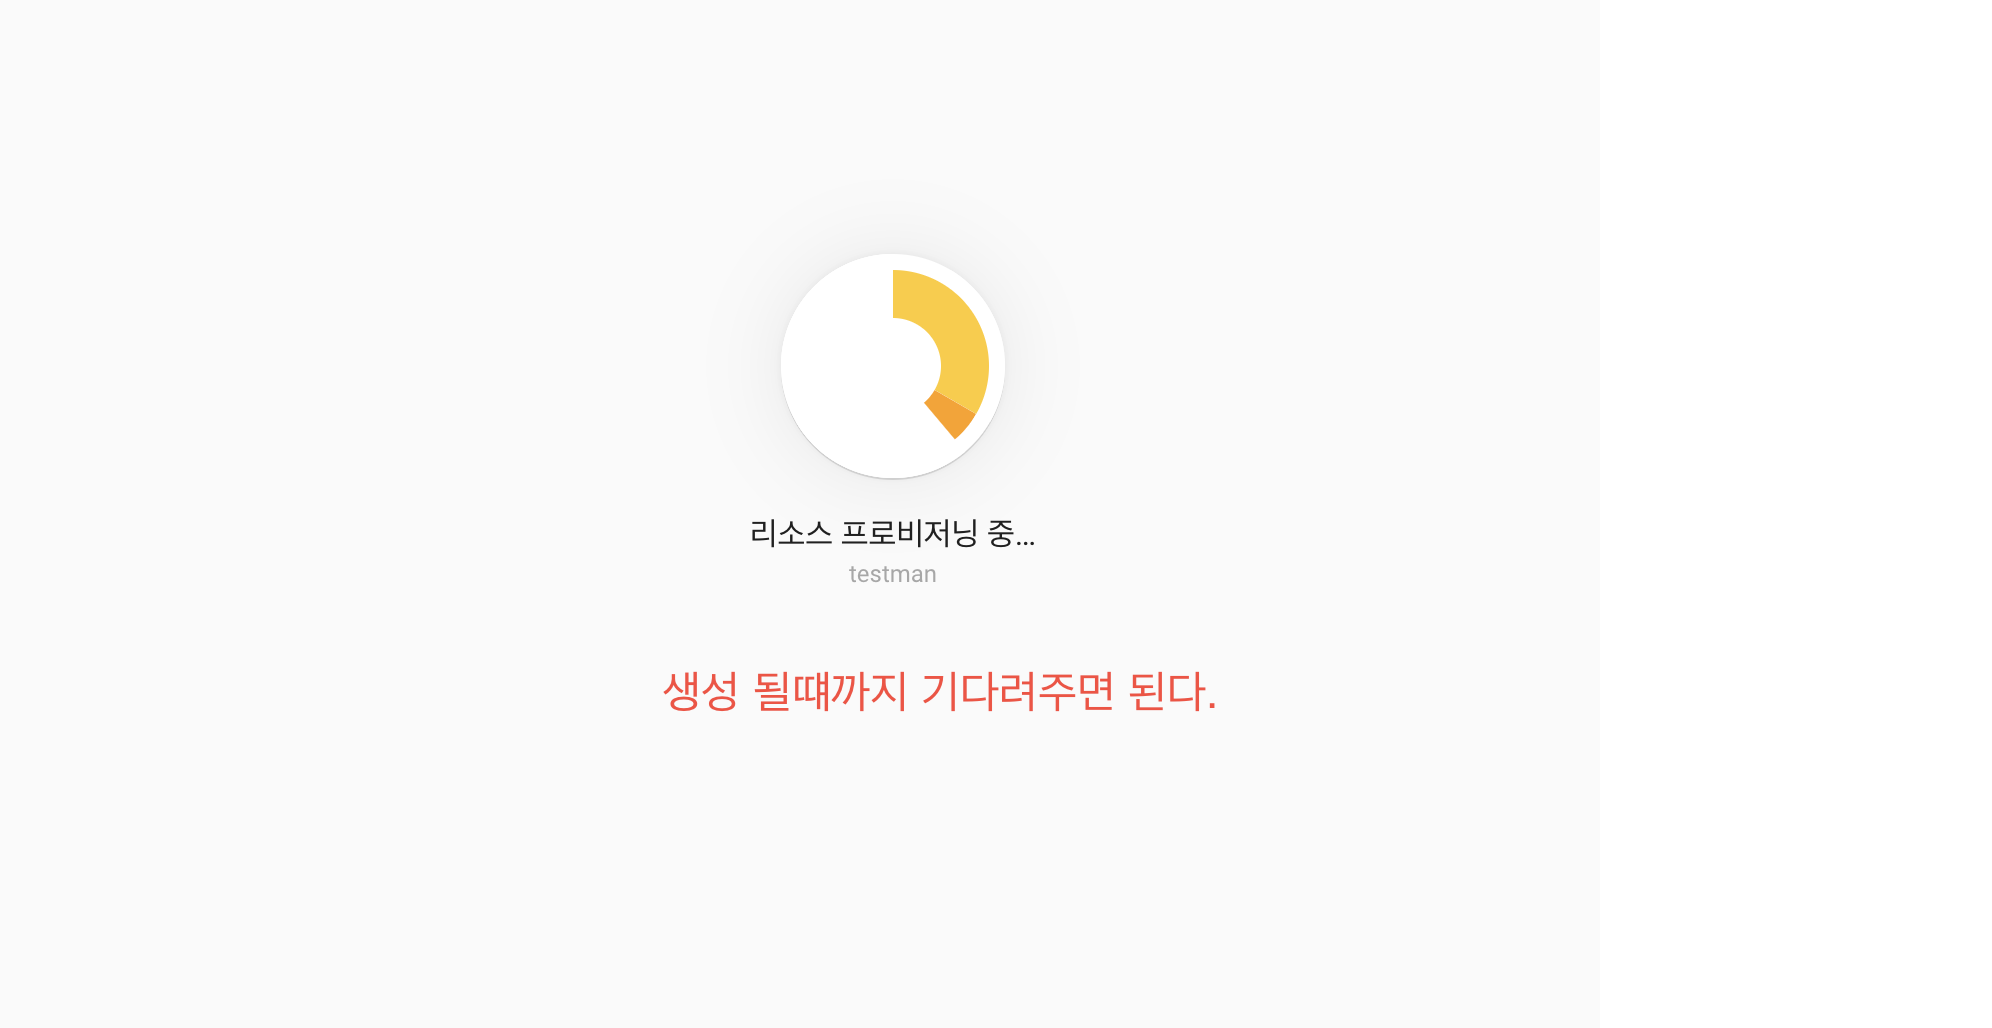
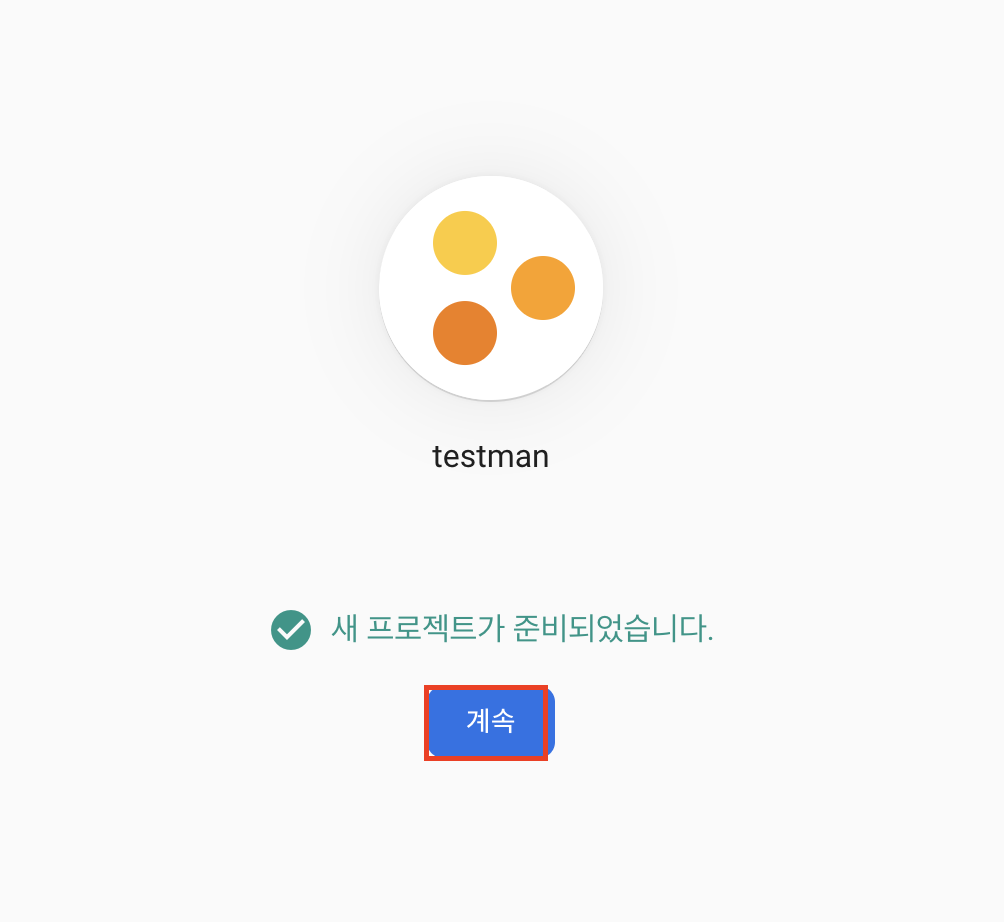
1. firebase 프로젝트 생성
-
Firebase 콘솔로 이동
-
프로젝트 생성
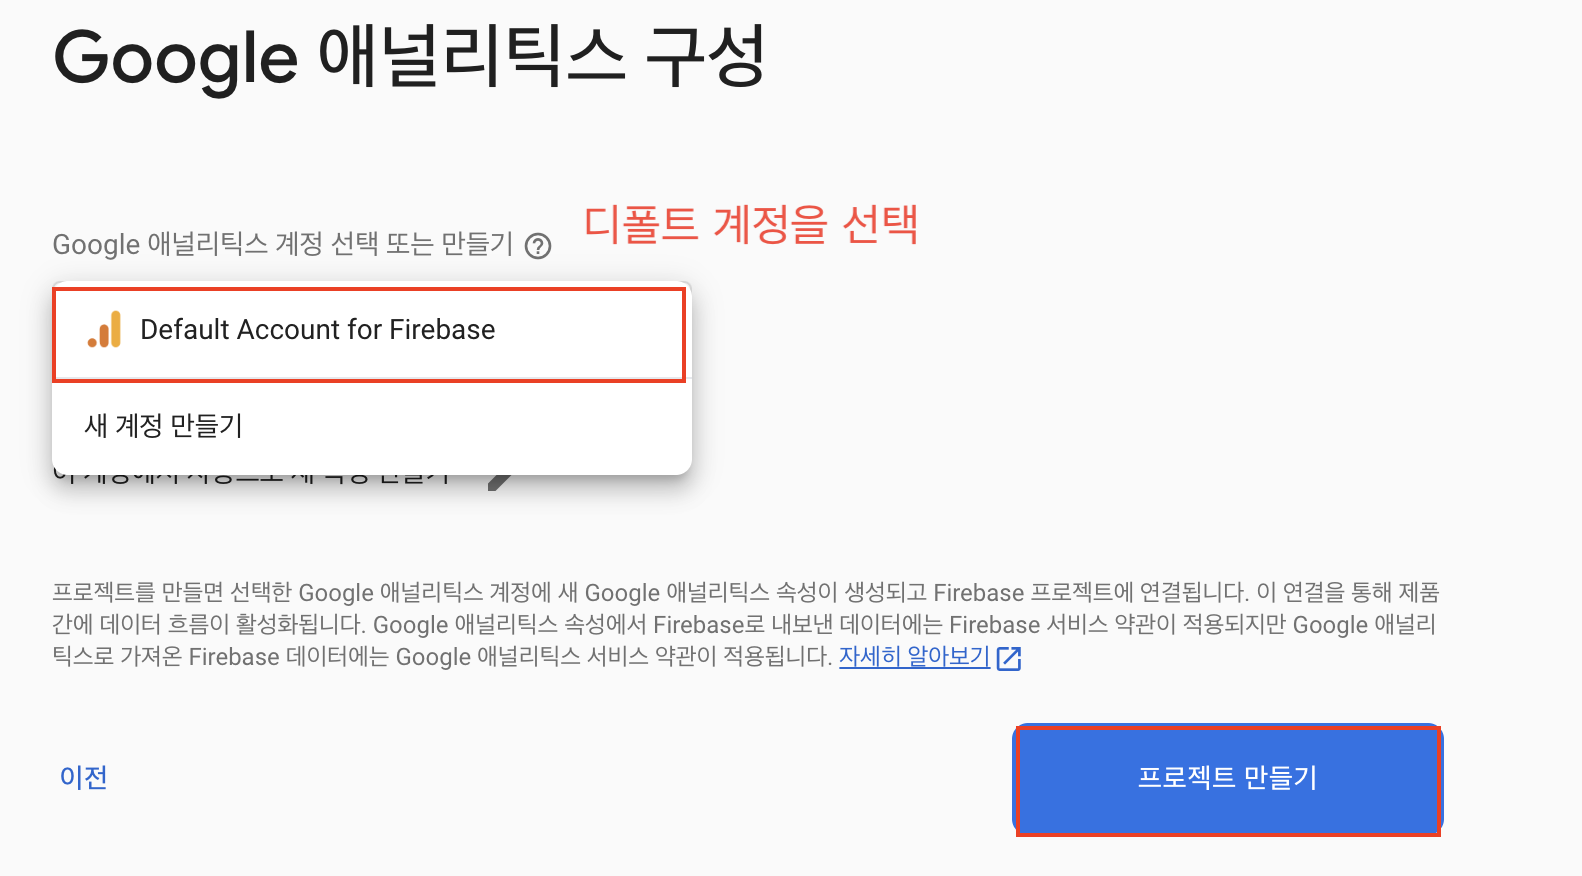
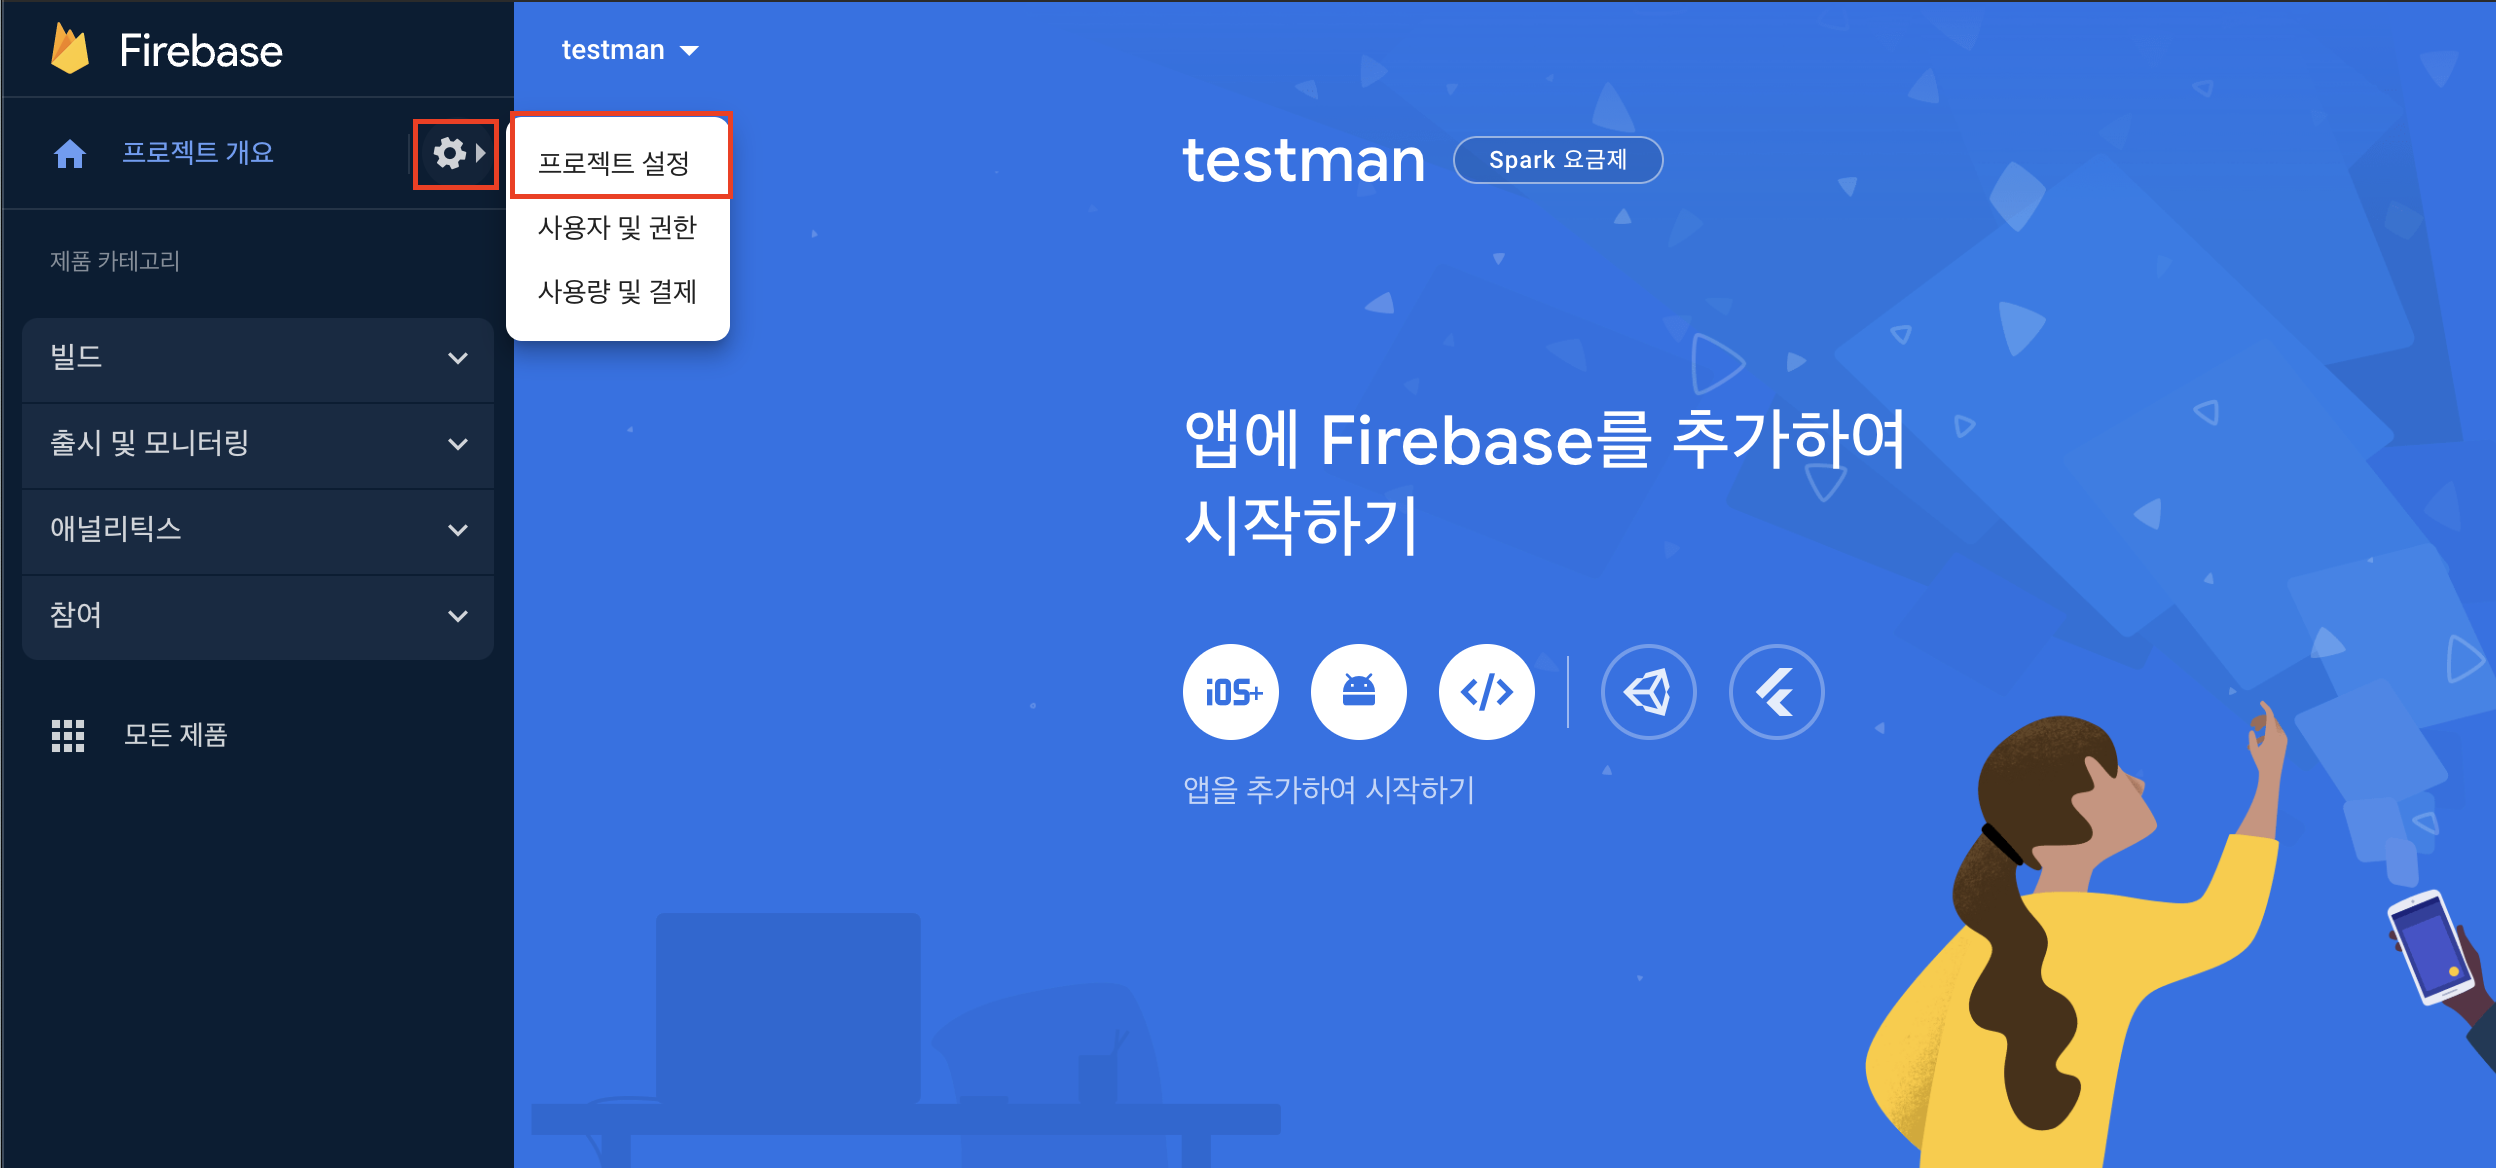
2. 엑세스 키 생성하기
-
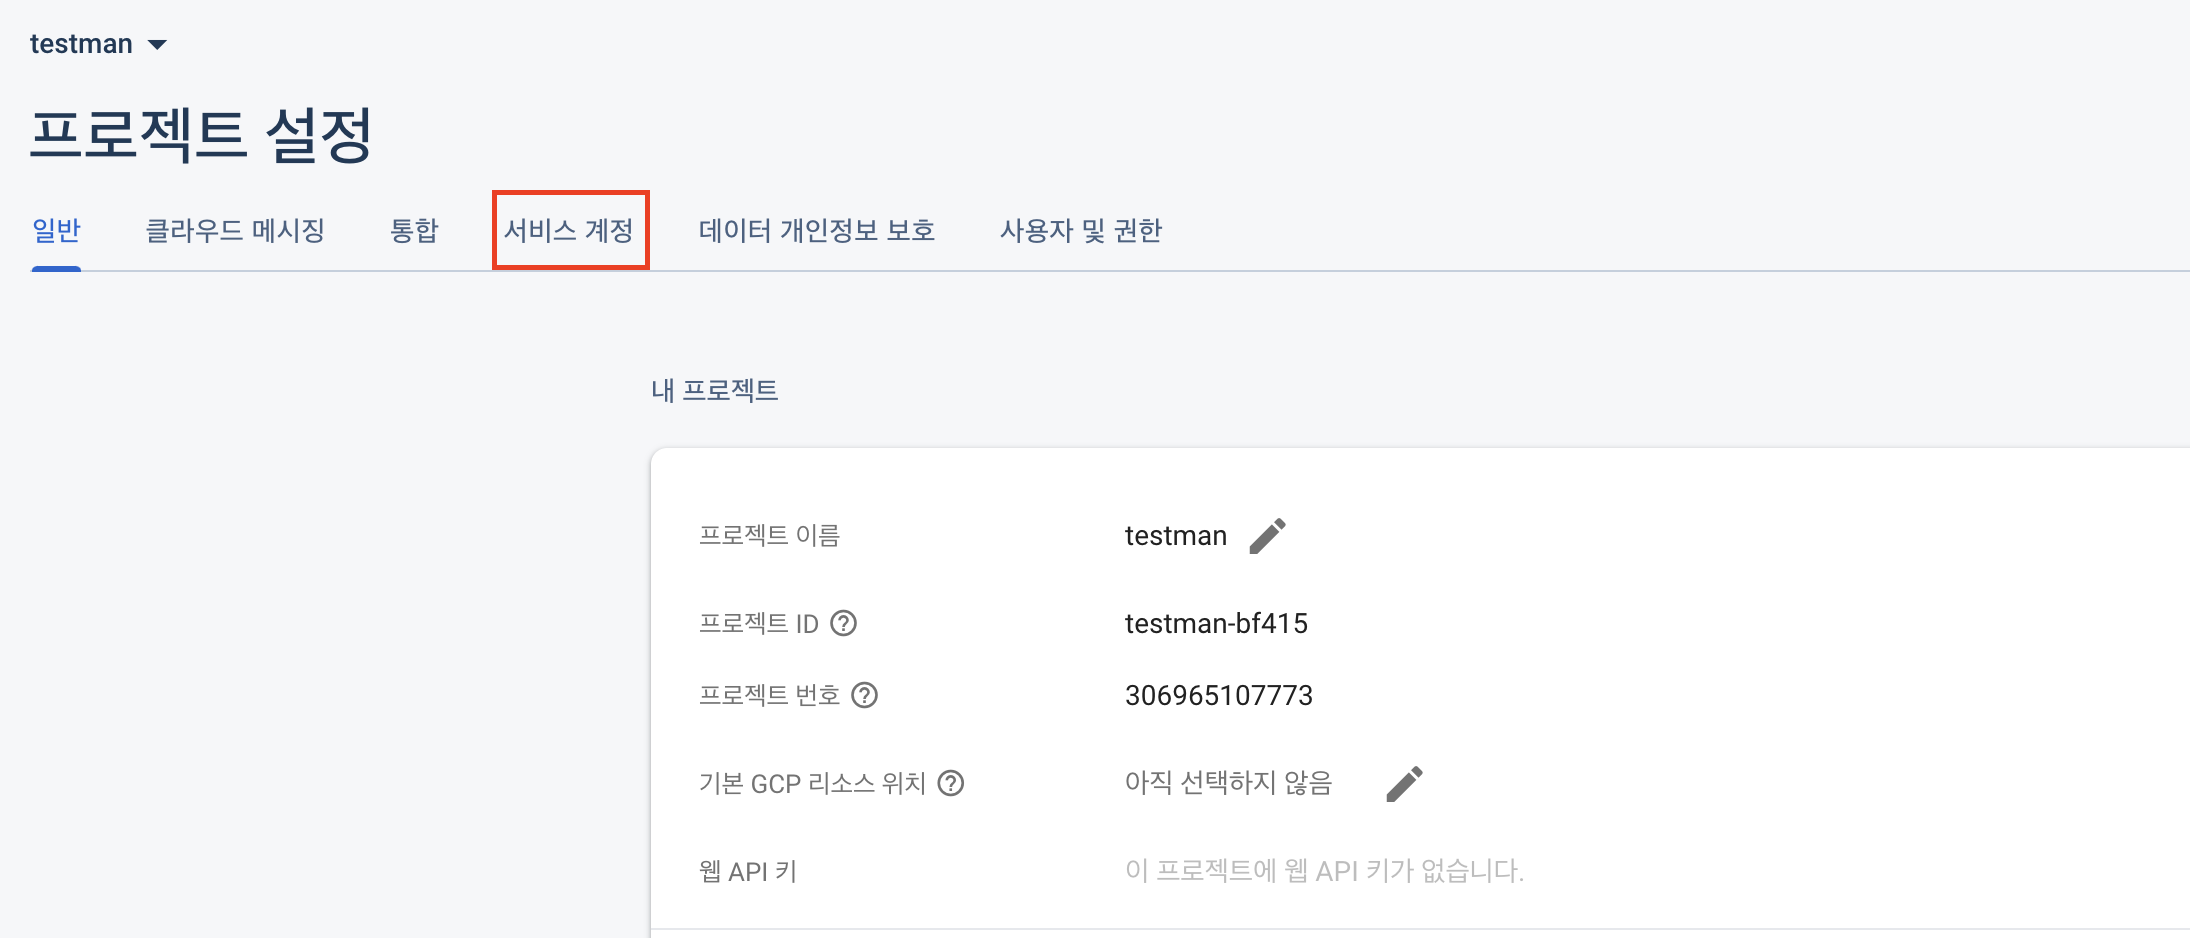
프로젝트 설정으로 들어간다.
-
서비스 계정 탭으로 이동
-
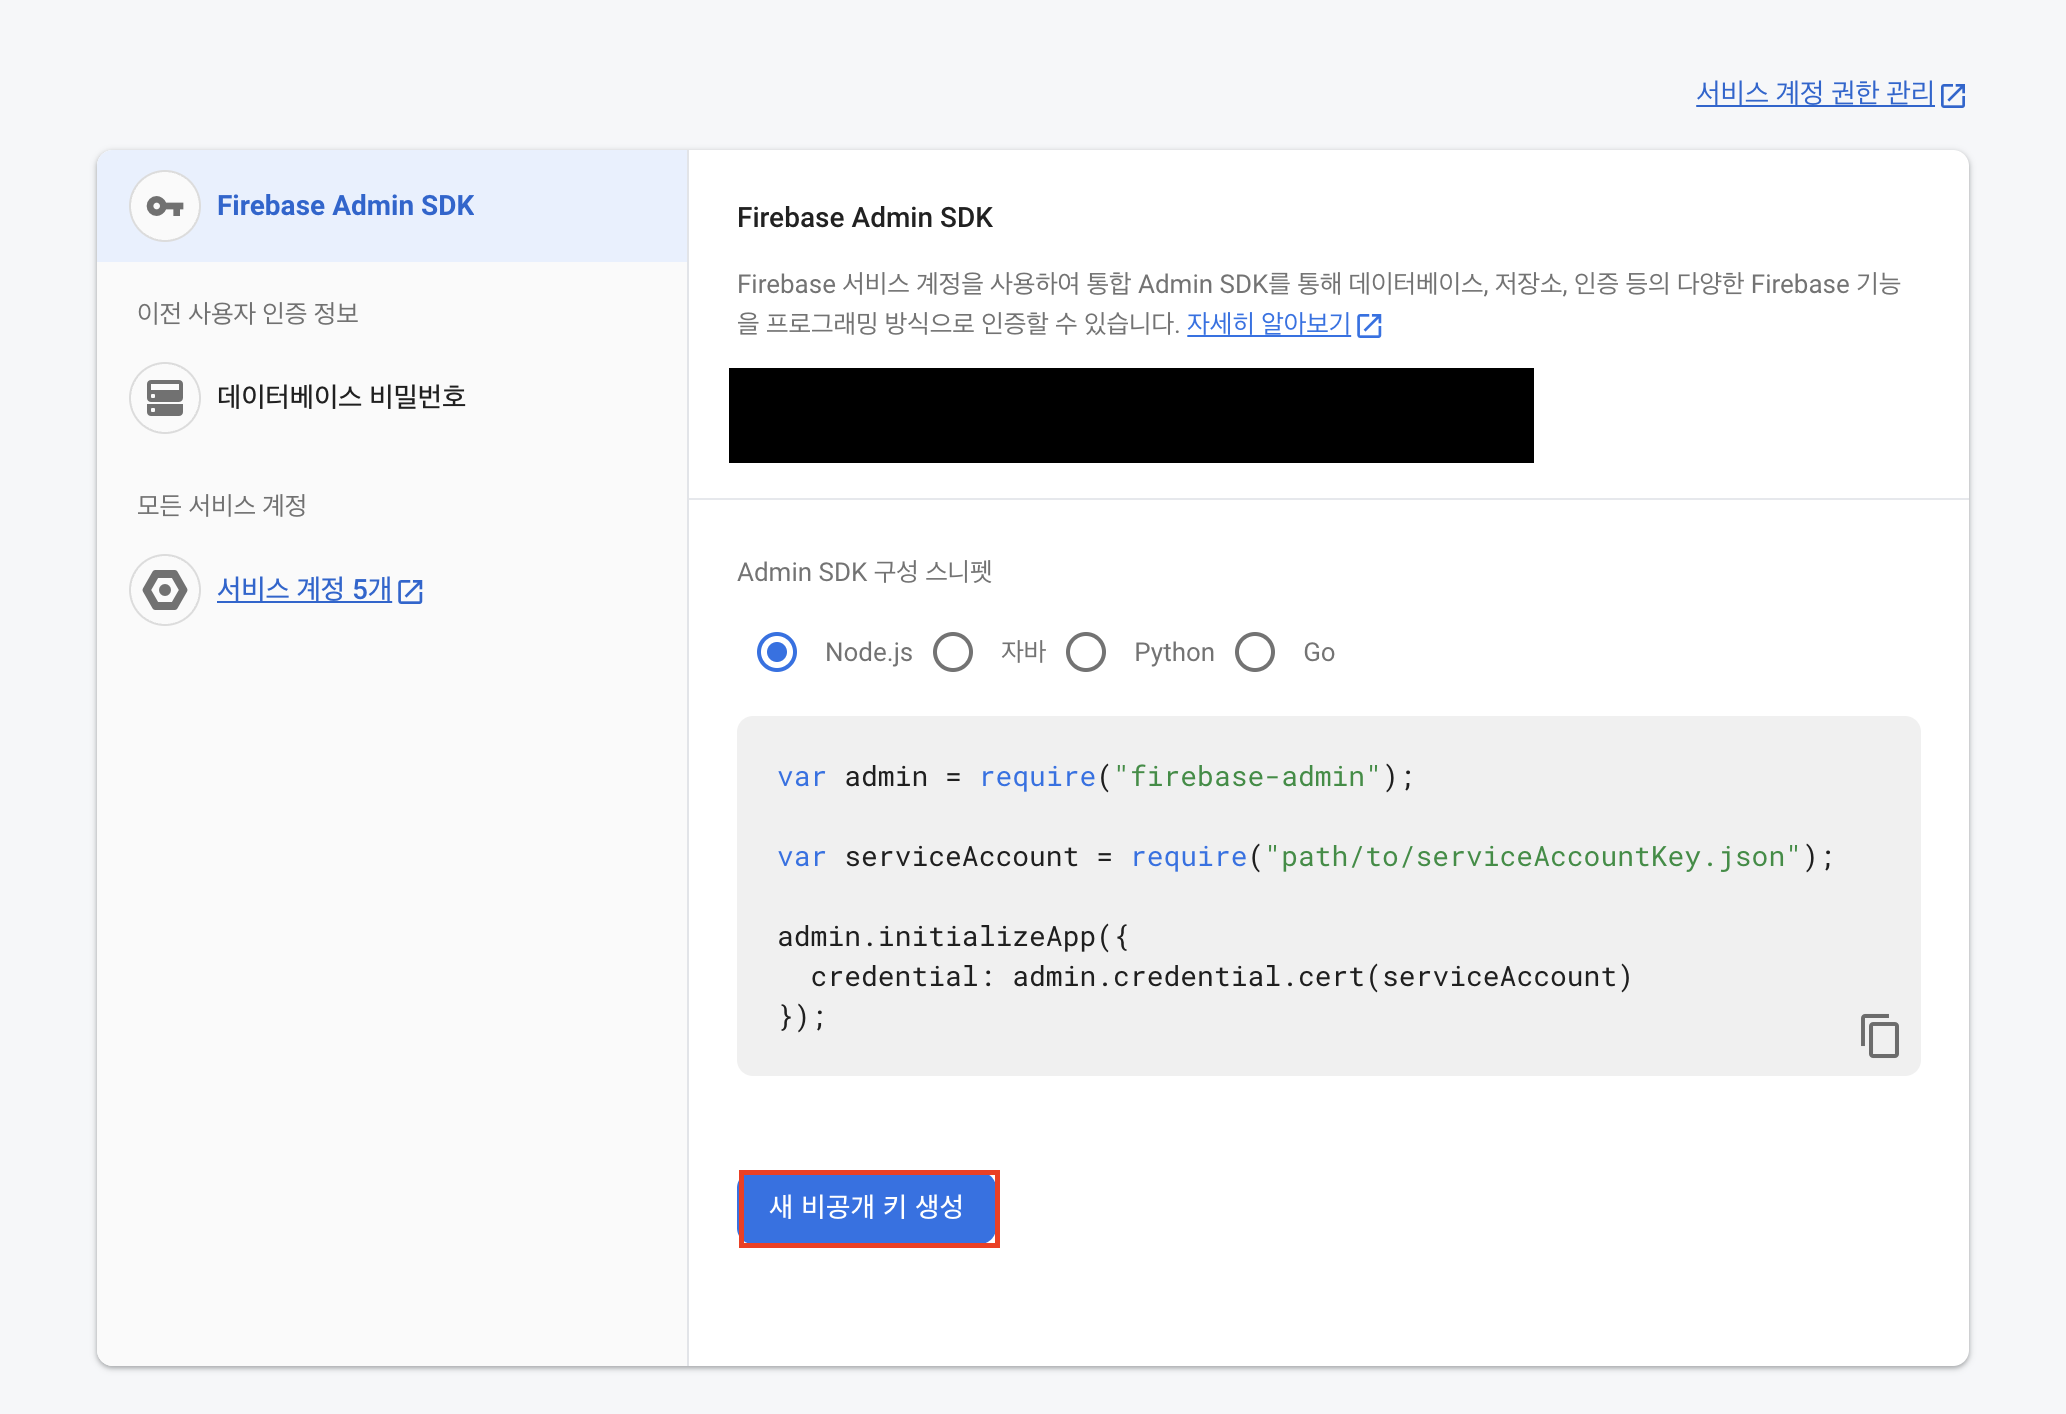
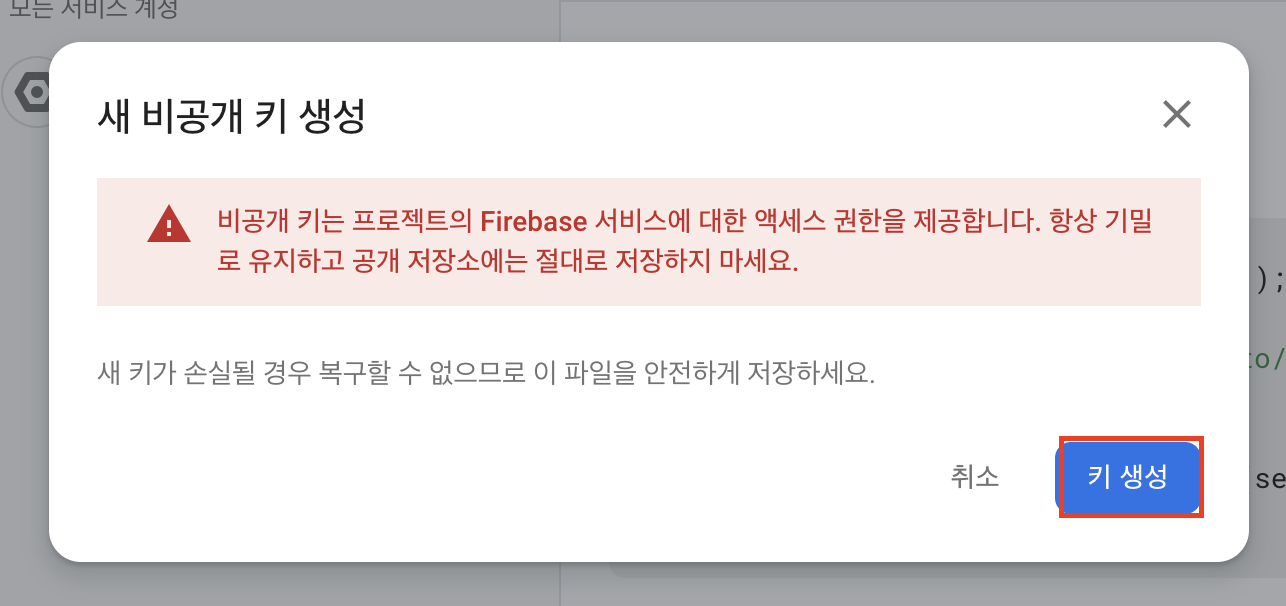
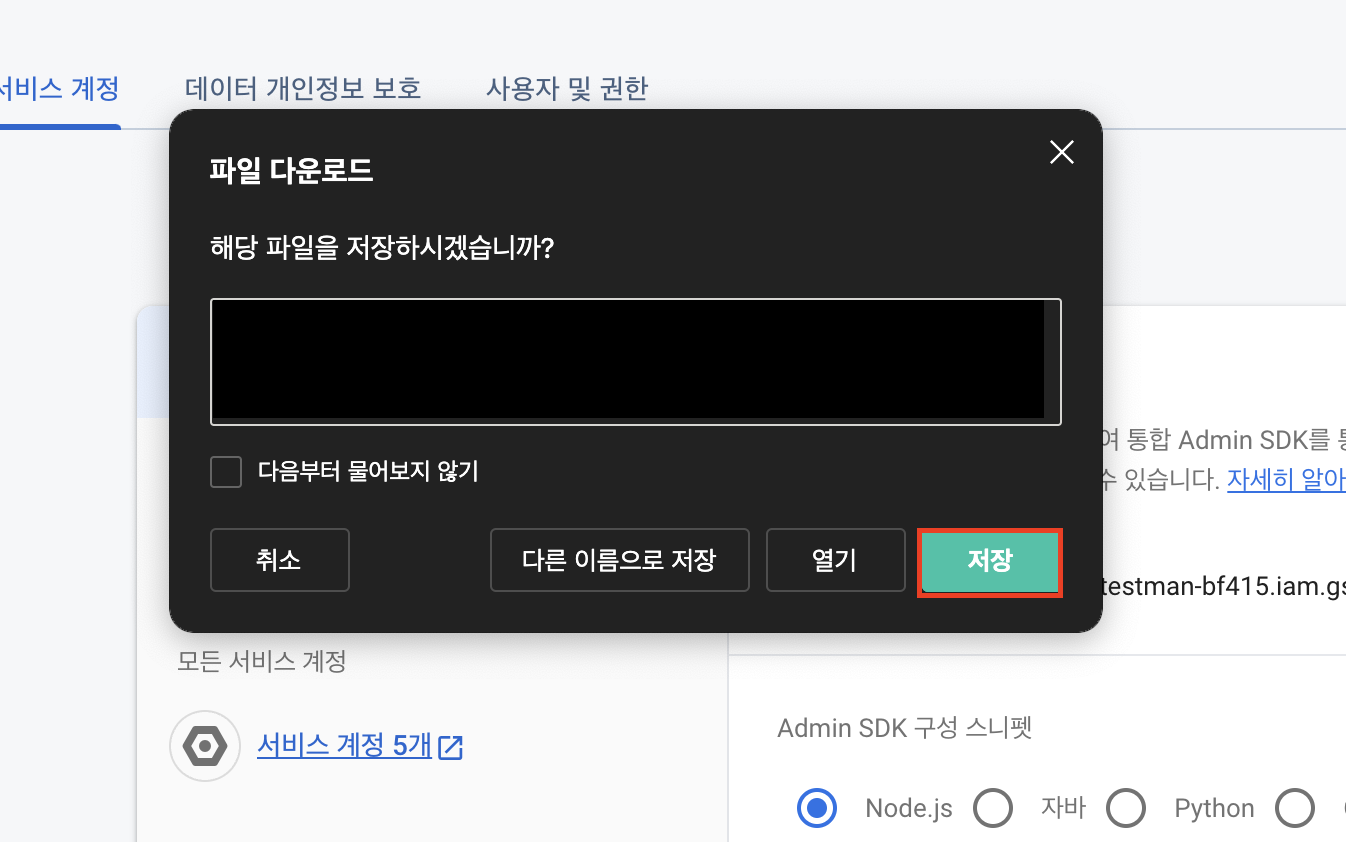
새 비공개 키를 생성하여 저장해준다. ( key 파일은 json 확장자 파일이다 )
3. spring boot 프로젝트 설정
-
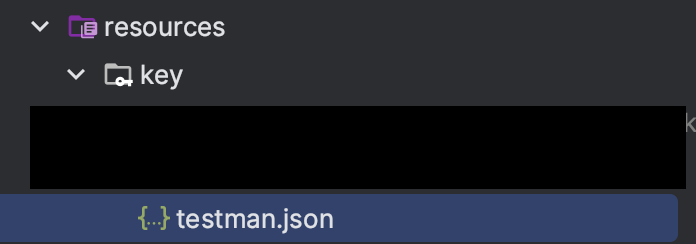
원하는 경로에 아까 받았던 키를 넣는다. ( 여기선 resources/key/ 에 넣음 )
키는 되도록이면 git에 저장하지 않는것이 좋다. 그러므로 .gitignore 해주는 것이 좋다.
-
build.gradle 추가
dependencies { ... implementation 'com.google.firebase:firebase-admin:9.1.1' implementation 'com.squareup.okhttp3:okhttp:4.11.0' } -
환경 변수를 지정해준다.
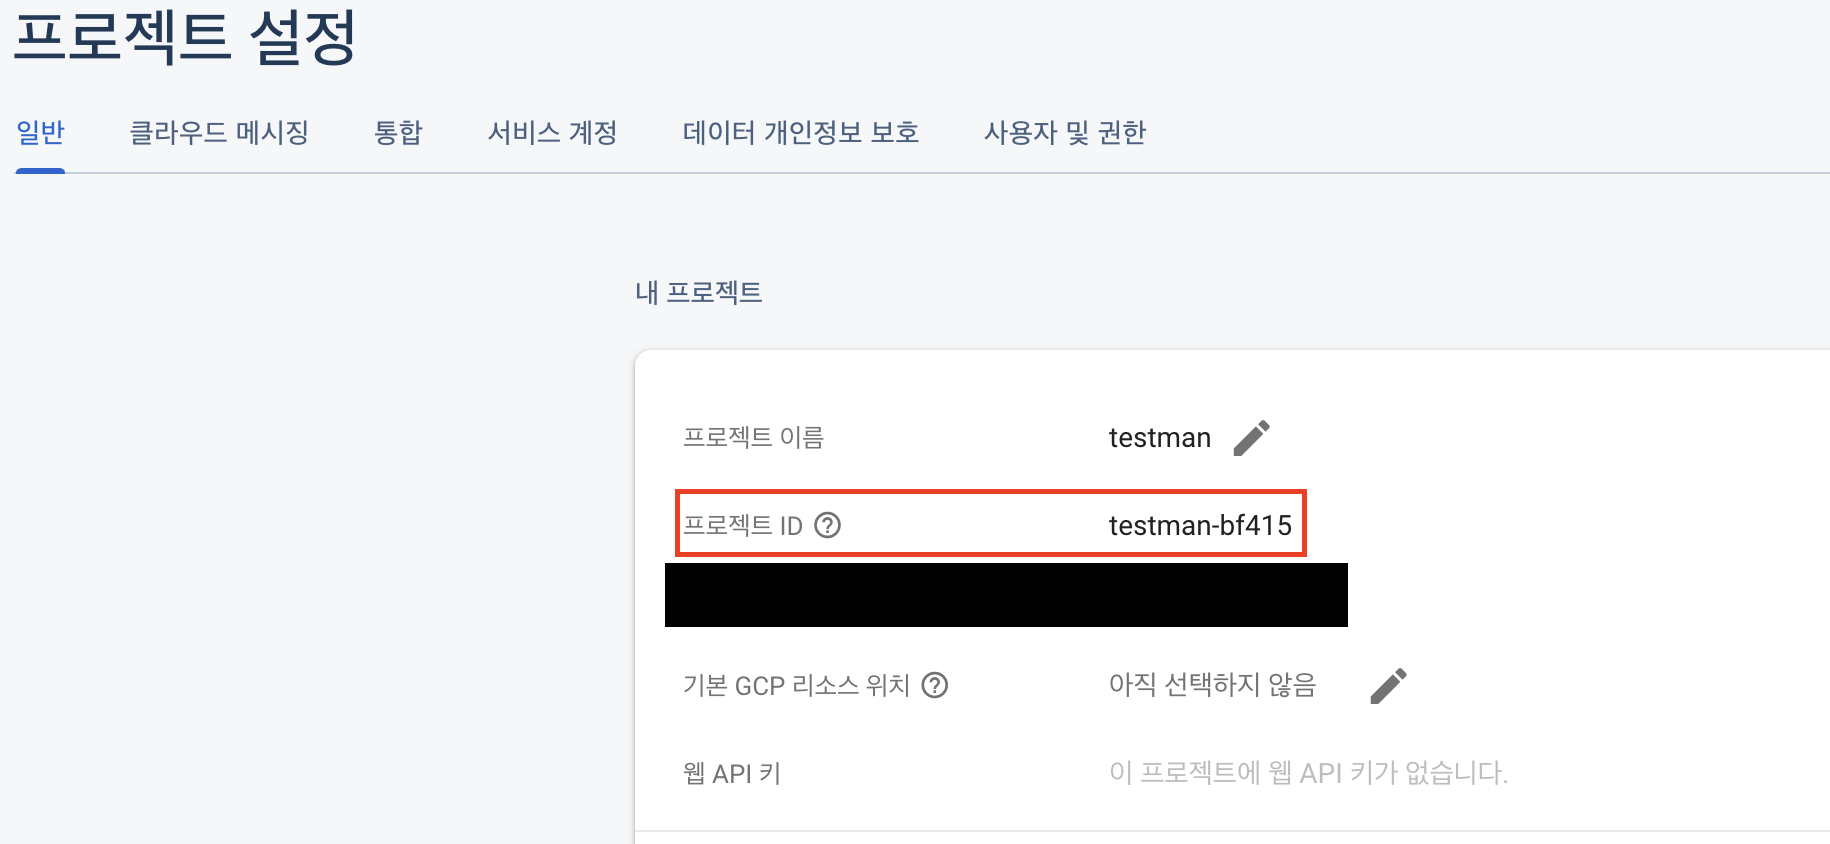
 ...

 fcm:
   service-account-file: key/testman.json # 비밀키 경로 ( 필수 )
   topic-name: testMessage # topic 이름 ( topic 통신시에 필요함 )
   project-id: testman-bf415 # firebase 프로젝트 아이디 ( 필수 )
fcm.service-account-file : 비밀키 경로로 위에서 저장했던 json 비밀키의 경로를 작성해주면 된다.
fcm.topic-name : topic 이름, 만약 topic으로 통신할 시에 작성해주면 된다.
fcm.project-id : firebase 프로젝트 아이디 , firebase 프로젝트에서 프로젝트 설명 페이지에서 확인가능
-
FcmService 를 생성하여 코드를 작성해준다.
import com.fasterxml.jackson.core.JsonProcessingException; import com.fasterxml.jackson.databind.ObjectMapper; import com.google.auth.oauth2.GoogleCredentials; import com.google.firebase.FirebaseApp; import com.google.firebase.FirebaseOptions; import com.google.firebase.messaging.FirebaseMessaging; import com.google.firebase.messaging.FirebaseMessagingException; import com.google.firebase.messaging.Message; import com.google.firebase.messaging.Notification; import jakarta.annotation.PostConstruct; import lombok.RequiredArgsConstructor; import org.springframework.beans.factory.annotation.Value; import org.springframework.core.io.ClassPathResource; import org.springframework.stereotype.Service; import java.io.IOException; @Service @RequiredArgsConstructor public class FcmService { // 비밀키 경로 환경 변수 ( 필수 ) @Value("${fcm.service-account-file}") private String serviceAccountFilePath; // topic 이름 환경 변수 @Value("${fcm.topic-name}") private String topicName; // 프로젝트 아이디 환경 변수 ( 필수 ) @Value("${fcm.project-id}") private String projectId; // 의존성 주입이 이루어진 후 초기화를 수행한다. @PostConstruct public void initialize() throws IOException { //Firebase 프로젝트 정보를 FireBaseOptions에 입력해준다. FirebaseOptions options = FirebaseOptions.builder() .setCredentials(GoogleCredentials.fromStream(new ClassPathResource(serviceAccountFilePath).getInputStream())) .setProjectId(projectId) .build(); //입력한 정보를 이용하여 initialze 해준다. FirebaseApp.initializeApp(options); } // 해당 지정된 topic에 fcm를 보내는 메서드 public void sendMessageByTopic(String title, String body) throws IOException, FirebaseMessagingException { FirebaseMessaging.getInstance().send(Message.builder() .setNotification(Notification.builder() .setTitle(title) .setBody(body) .build()) .setTopic(topicName) .build()); } // 받은 token을 이용하여 fcm를 보내는 메서드 public void sendMessageByToken(String title, String body,String token) throws FirebaseMessagingException{ FirebaseMessaging.getInstance().send(Message.builder() .setNotification(Notification.builder() .setTitle(title) .setBody(body) .build()) .setToken(token) .build()); } } -
해당 Service 를 이용하여, 테스트 할 수 있게 Controller 를 작성해준다.
-
MessageRequestDTO
 import lombok.AllArgsConstructor;
 import lombok.Data;

 @AllArgsConstructor
 @Data
 public class MessageRequestDTO {
     private String title;
     private String body;
     private String targetToken;
 }
b. FcmController
import com.example.fcmtest.dto.MessageRequestDTO; import com.example.fcmtest.service.FcmService; import com.google.firebase.messaging.FirebaseMessagingException; import lombok.RequiredArgsConstructor; import lombok.extern.slf4j.Slf4j; import org.springframework.http.ResponseEntity; import org.springframework.web.bind.annotation.PostMapping; import org.springframework.web.bind.annotation.RequestBody; import org.springframework.web.bind.annotation.RestController; import java.io.IOException; @RestController @RequiredArgsConstructor @Slf4j public class FcmController { private final FcmService fcmService; // fcm를 보낸다 ( topic ) @PostMapping("/message/fcm/topic") public ResponseEntity sendMessageTopic(@RequestBody MessageRequestDTO requestDTO) throws IOException, FirebaseMessagingException{ fcmService.sendMessageByTopic(requestDTO.getTitle(), requestDTO.getBody()); return ResponseEntity.ok().build(); } // fcm를 보낸다 ( token ) @PostMapping("/message/fcm/token") public ResponseEntity sendMessageToken(@RequestBody MessageRequestDTO requestDTO) throws IOException, FirebaseMessagingException{ fcmService.sendMessageByToken(requestDTO.getTitle(), requestDTO.getBody(), requestDTO.getTargetToken()); return ResponseEntity.ok().build(); } } -
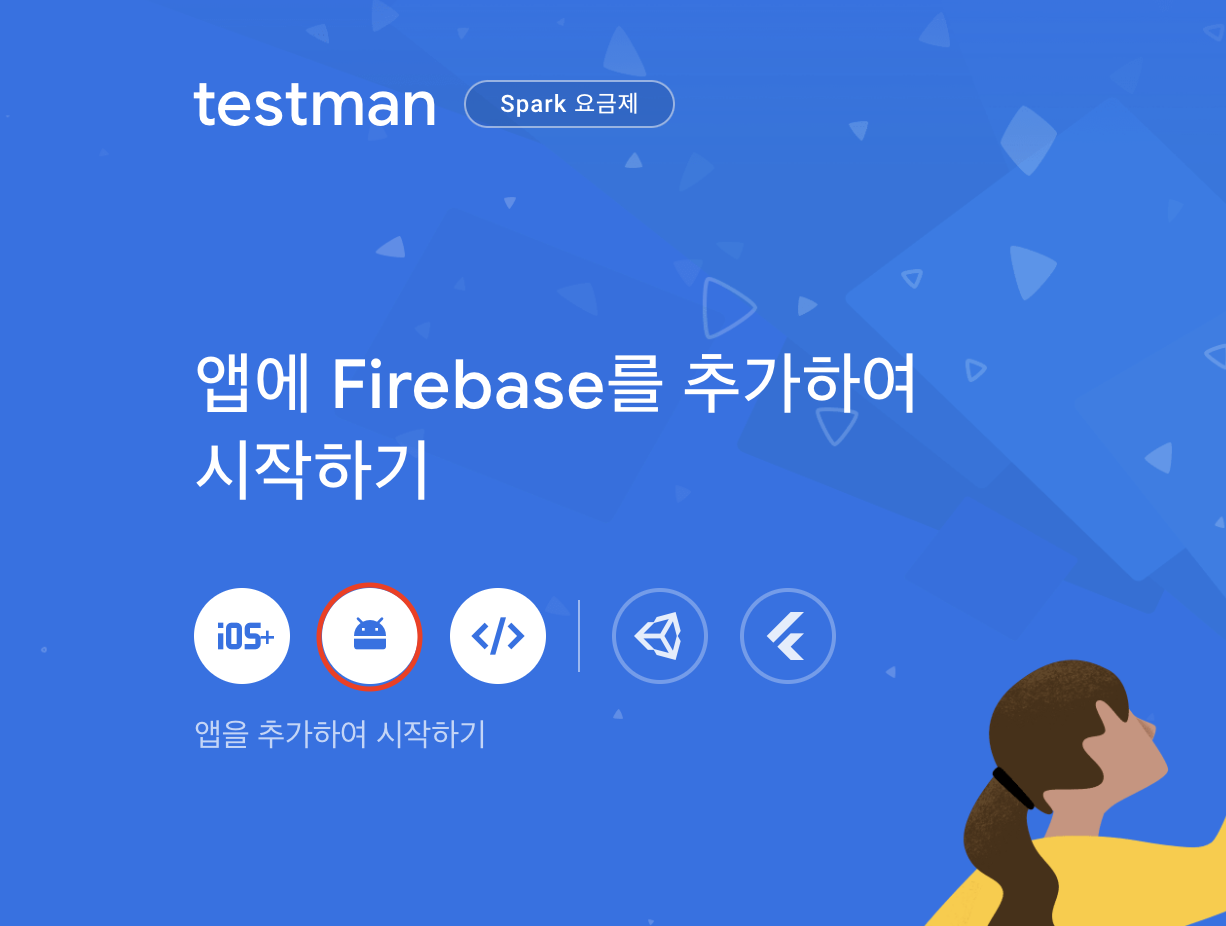
4. android 앱 설정
- firebase 콘솔에 이동
-
firebase 추가에서 android 클릭
-
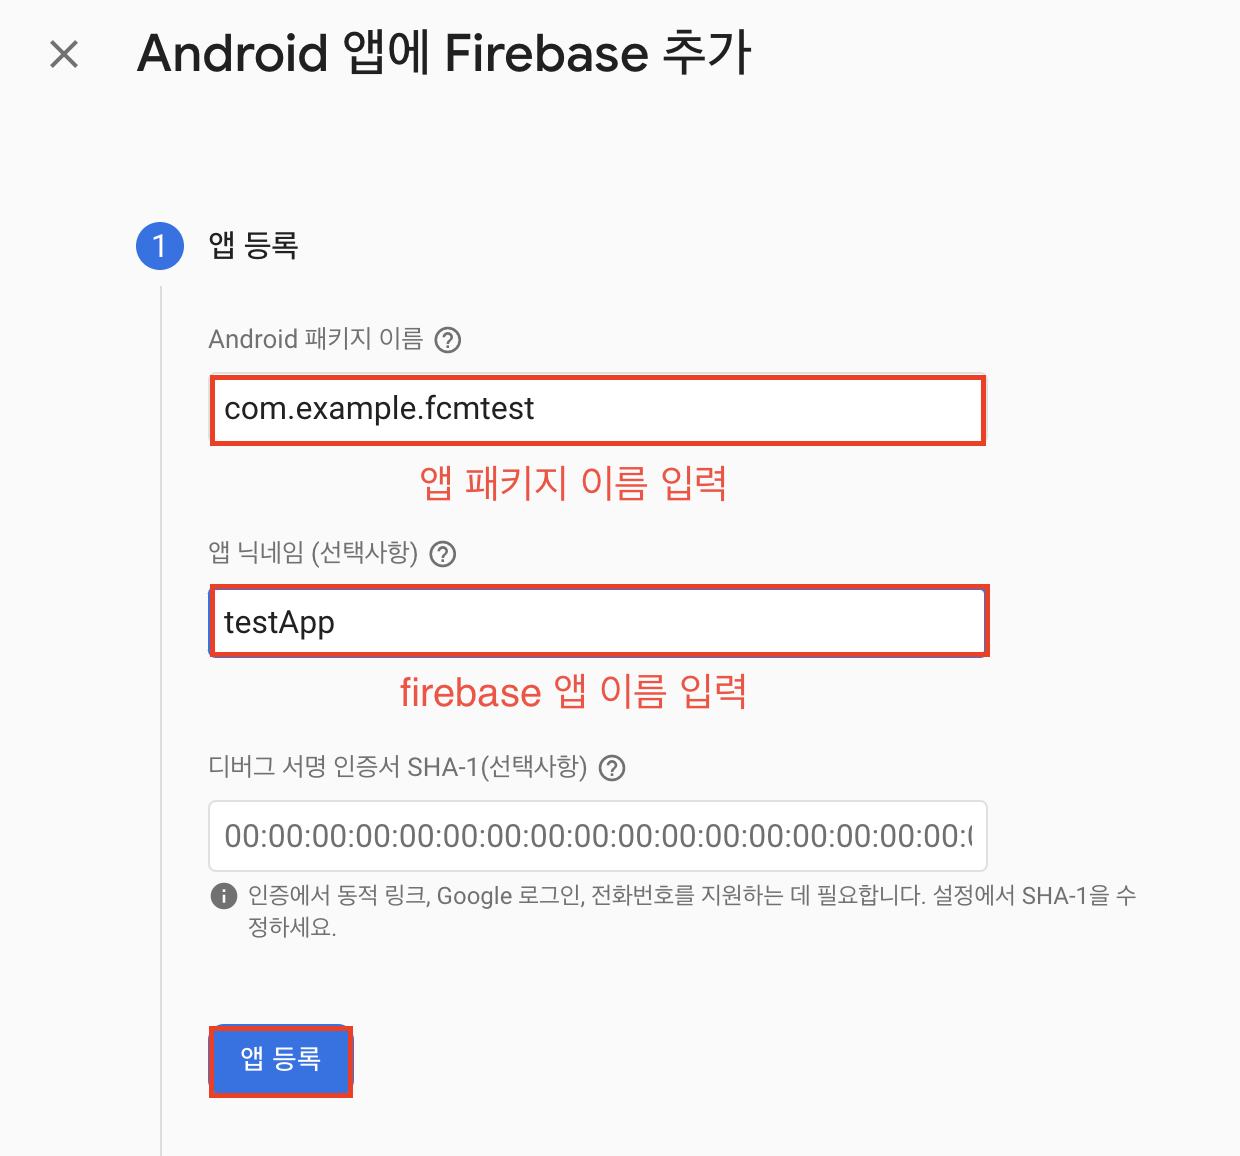
패키지 이름 ( 필수 ), 앱 닉네임 를 입력 후 앱등록을 해준다.
-
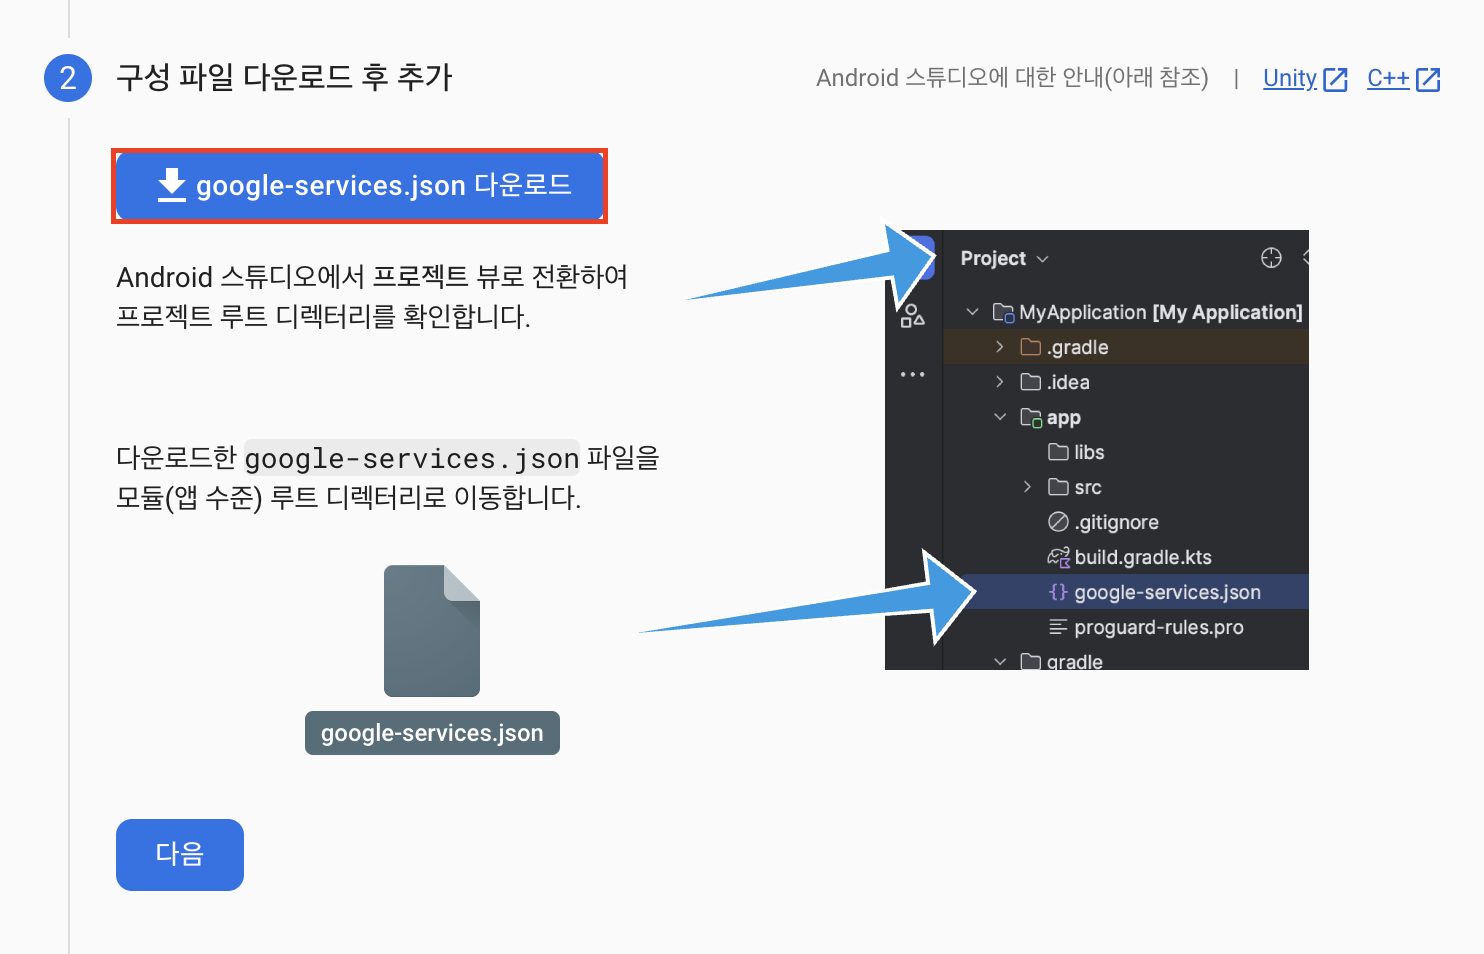
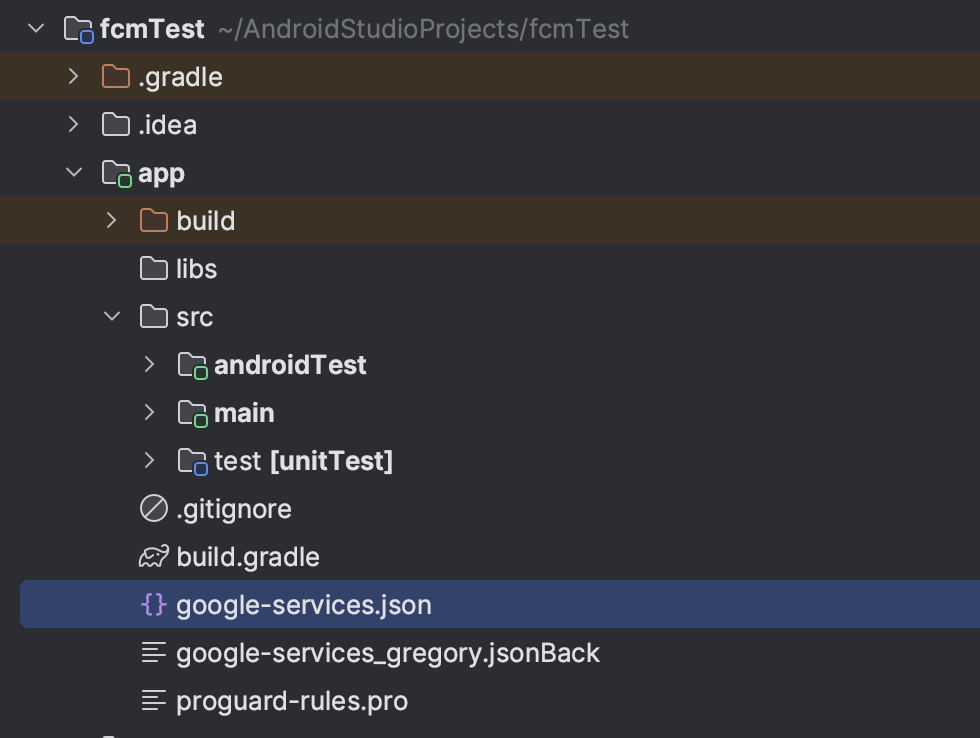
google-service.json 다운로드 후 project/app 에 넣기
-
프로젝트 기준의 build.gradle plugins 추가
plugins { ... id 'com.google.gms.google-services' version '4.3.15' apply false } -
앱 기준의 build.gradle 에 plugins , dependencies 추가
plugins { id 'com.android.application' // Add the Google services Gradle plugin id 'com.google.gms.google-services' ... } dependencies { // Import the Firebase BoM implementation platform('com.google.firebase:firebase-bom:32.2.3') // TODO: Add the dependencies for Firebase products you want to use // When using the BoM, don't specify versions in Firebase dependencies implementation 'com.google.firebase:firebase-analytics' // Add the dependencies for any other desired Firebase products // https://firebase.google.com/docs/android/setup#available-libraries } -
AndroidManifest.xml 수정
<?xml version="1.0" encoding="utf-8"?> <manifest xmlns:android="http://schemas.android.com/apk/res/android" xmlns:tools="http://schemas.android.com/tools"> <uses-permission android:name="android.permission.INTERNET"/><!-- 인터넷 허용 추가 --> <uses-permission android:name="android.permission.POST_NOTIFICATIONS"/> <application android:allowBackup="true" android:dataExtractionRules="@xml/data_extraction_rules" android:fullBackupContent="@xml/backup_rules" android:icon="@mipmap/ic_launcher" android:label="@string/app_name" android:roundIcon="@mipmap/ic_launcher_round" android:supportsRtl="true" android:theme="@style/Theme.FcmTest" tools:targetApi="31"> <!-- firebase service 지정해주기 --> <service android:name=".MyFirebaseMessagingService" android:exported="false"> <intent-filter> <action android:name="com.google.firebase.MESSAGING_EVENT" /> <!-- message 이벤트 추가 --> </intent-filter> </service> ... </application> </manifest> -
MyFirebaseMessagingService 추가
import android.util.Log; import androidx.annotation.NonNull; import com.google.firebase.messaging.FirebaseMessaging; import com.google.firebase.messaging.FirebaseMessagingService; public class MyFirebaseMessagingService extends FirebaseMessagingService { //새로운 토큰을 생성할 시에 로그로 보냄 @Override public void onNewToken(@NonNull String token) { super.onNewToken(token); Log.d("asdfqwer", token); } @Override public void onCreate() { super.onCreate(); //지정된 토픽을 구독한다. FirebaseMessaging.getInstance().subscribeToTopic("testMessage"); } } -
만약 토큰 사용시에는 로그를 확인하여 토큰을 확인한다.

-
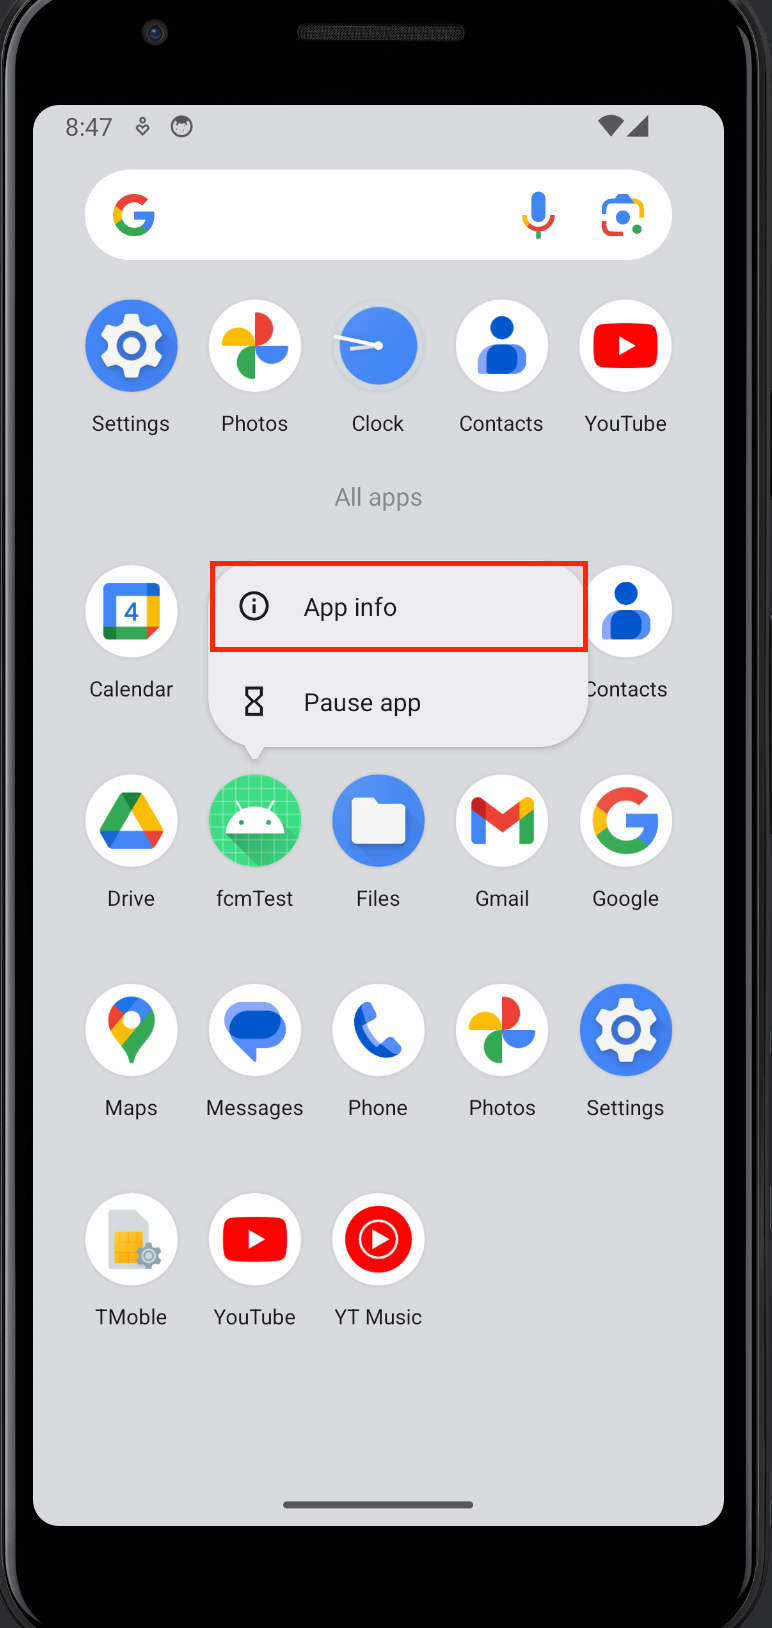
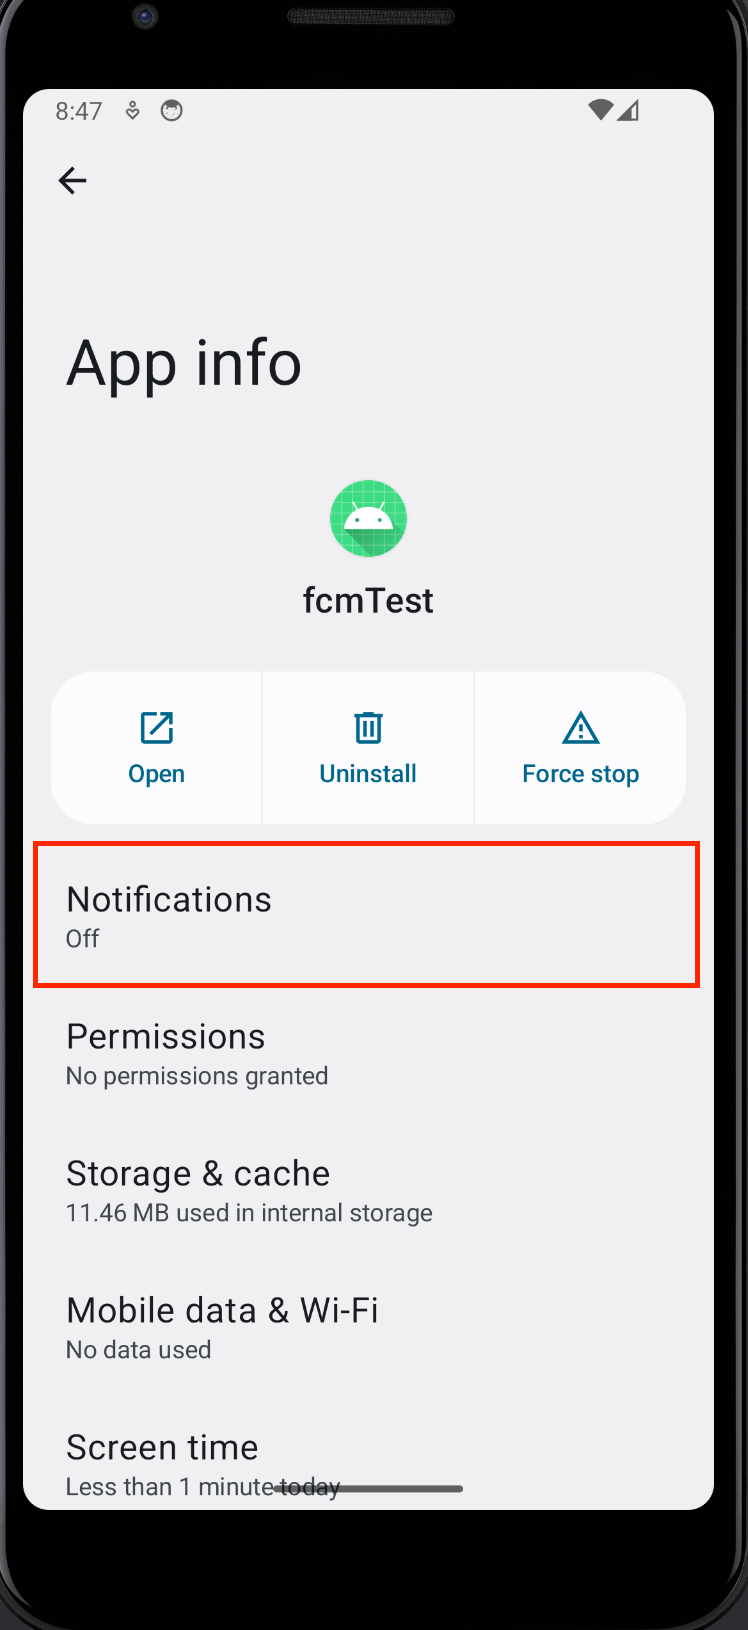
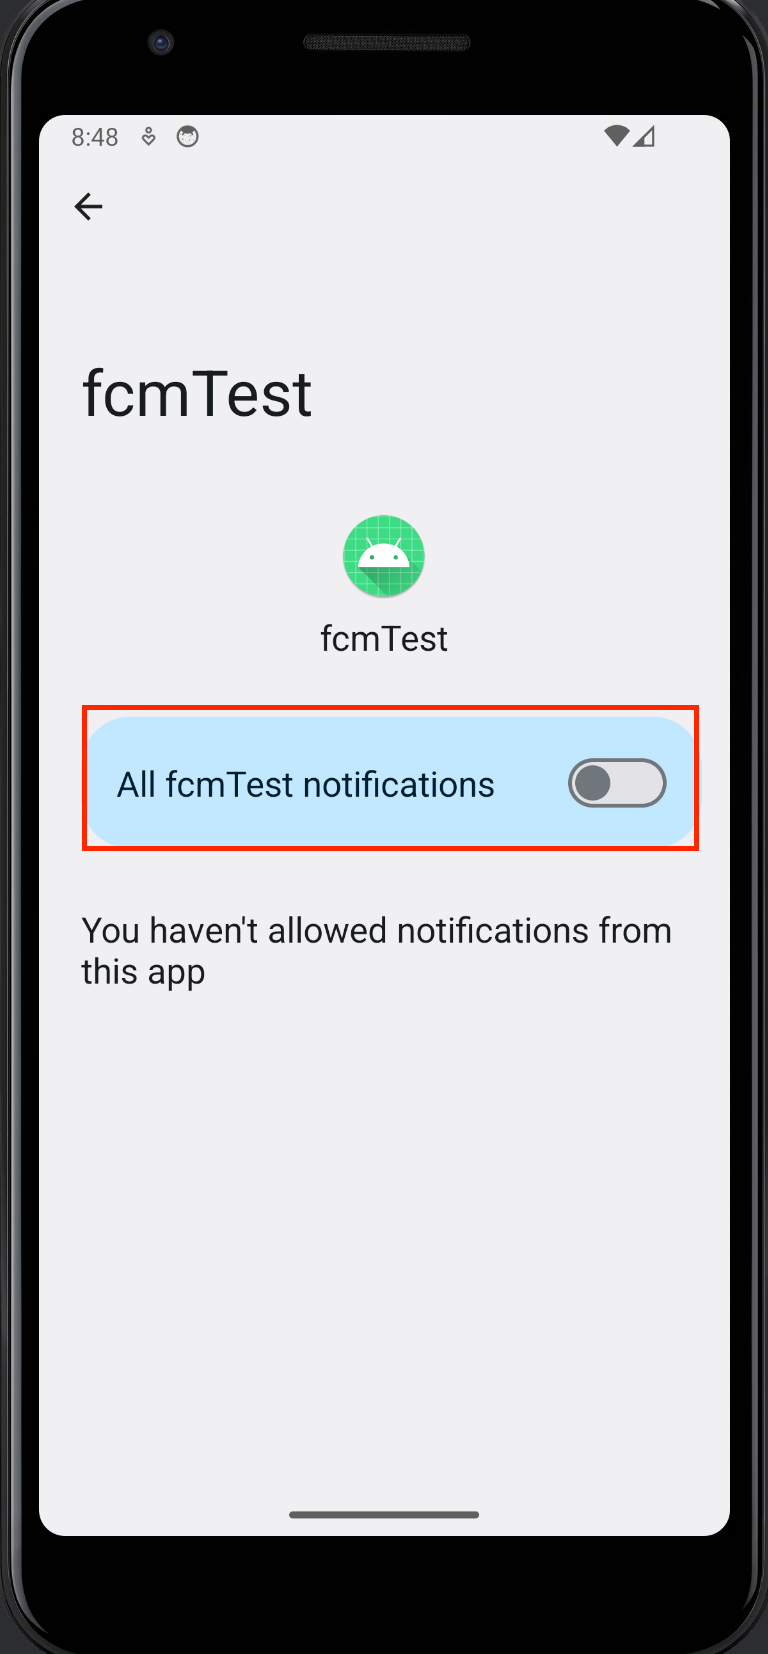
설치한 테스트앱의 알람권한을 허용해준다.

5. 테스트
-
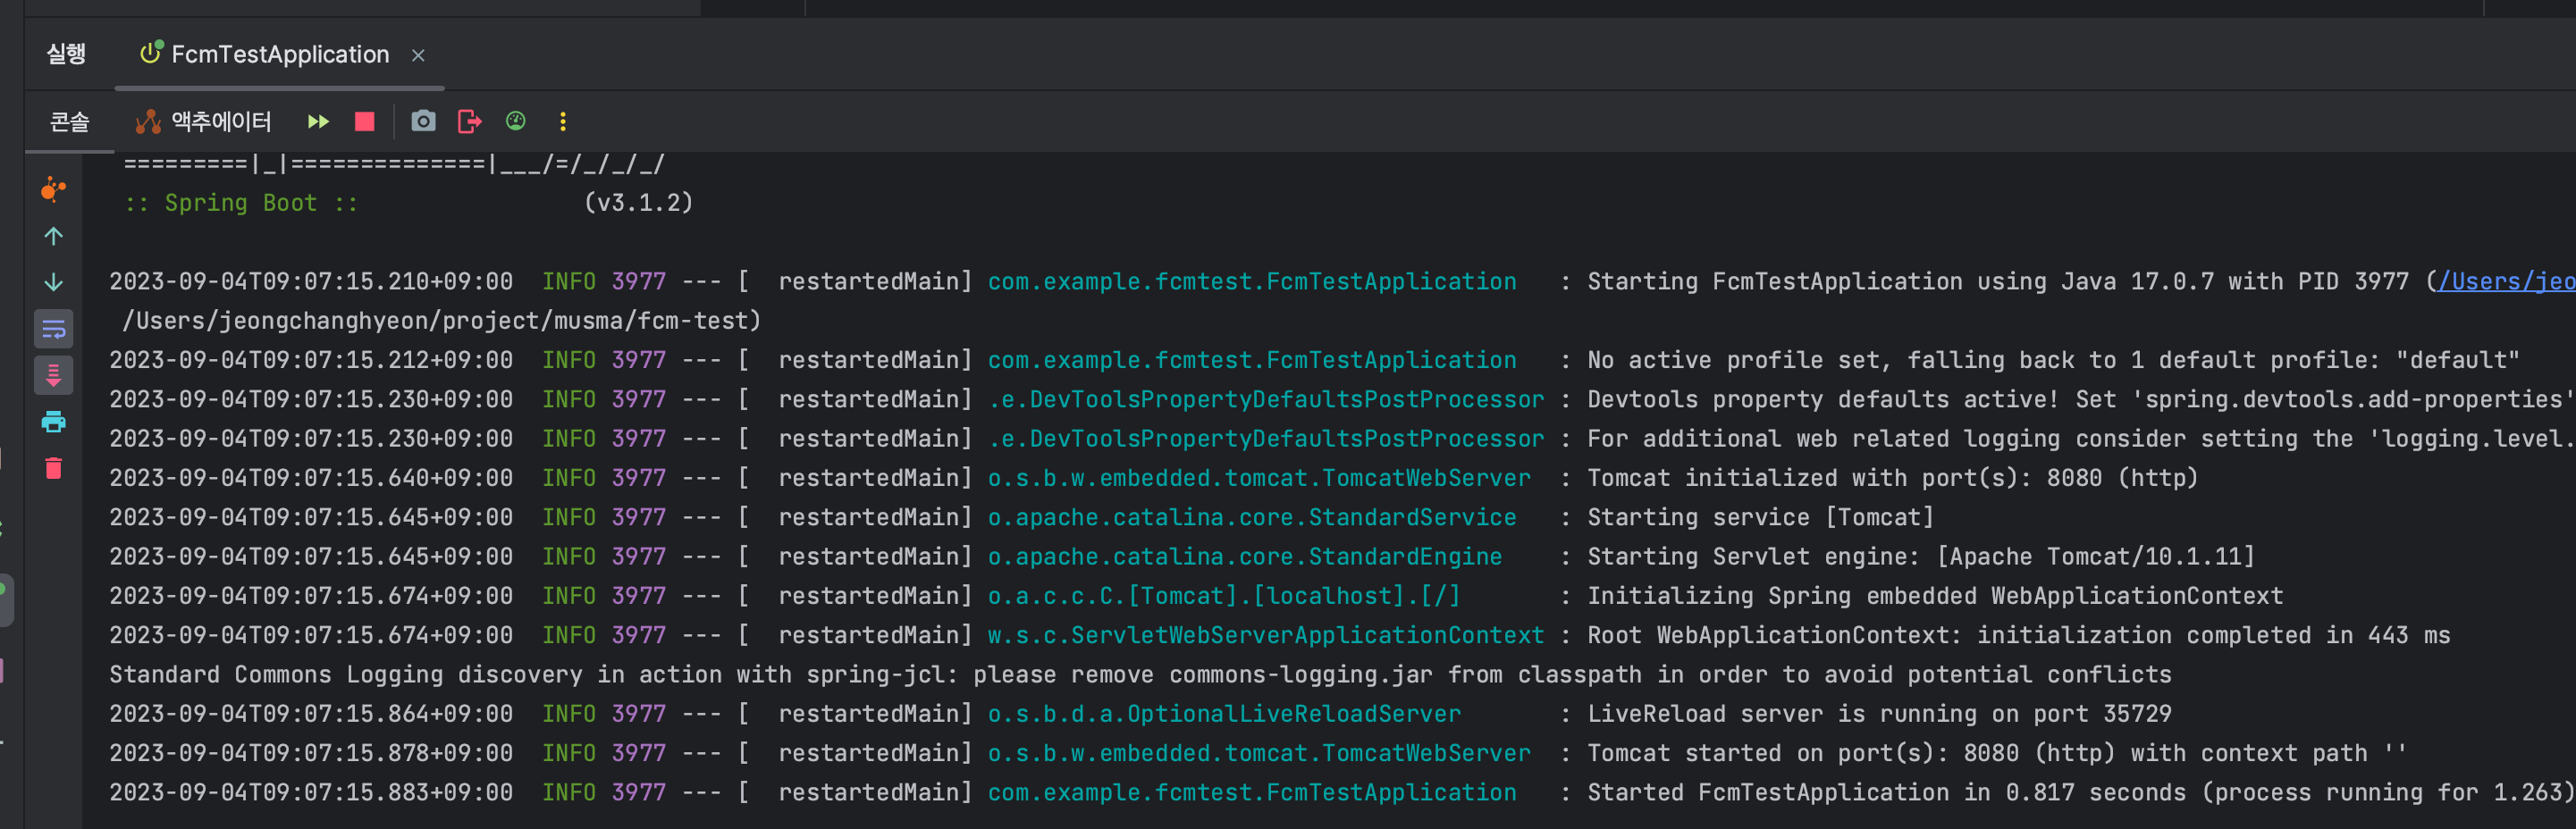
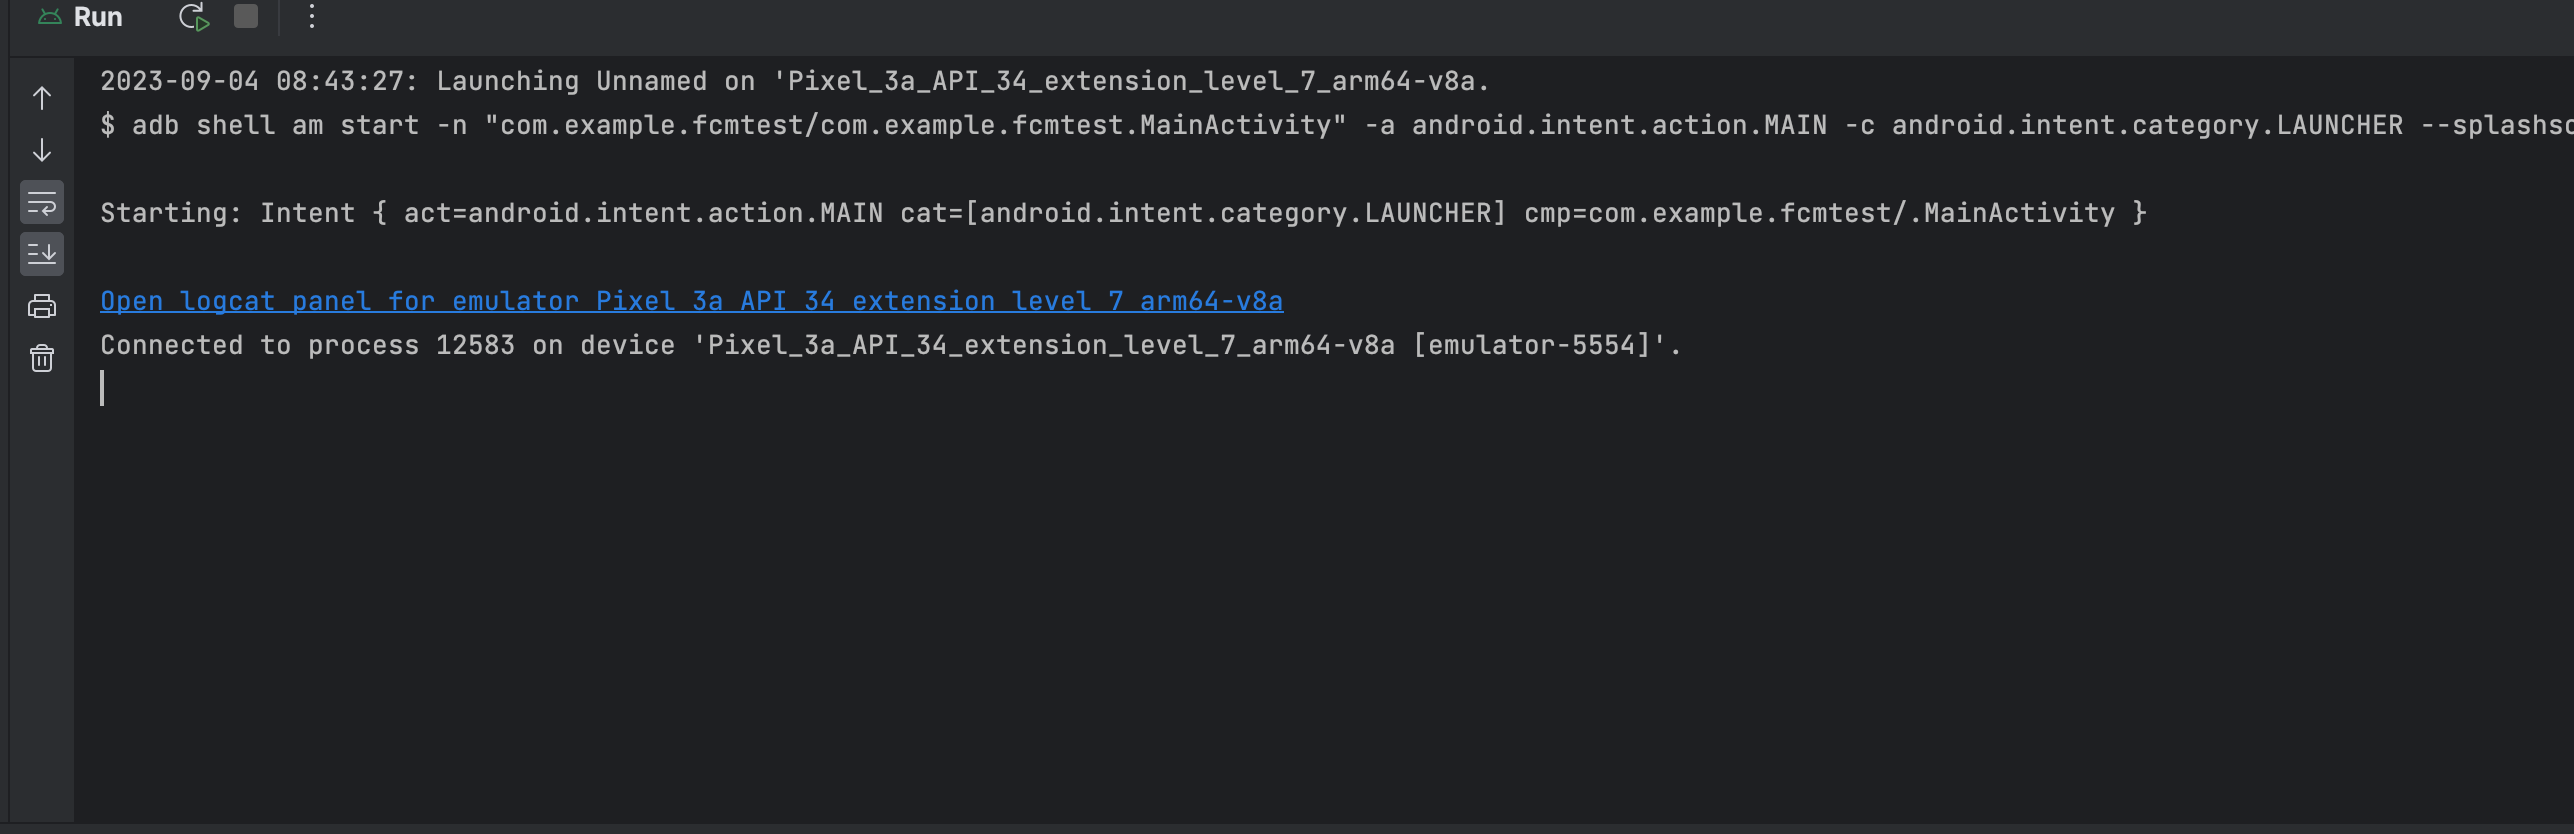
spring boot 서버와 테스트 안드로이드 앱을 실행한다.
-
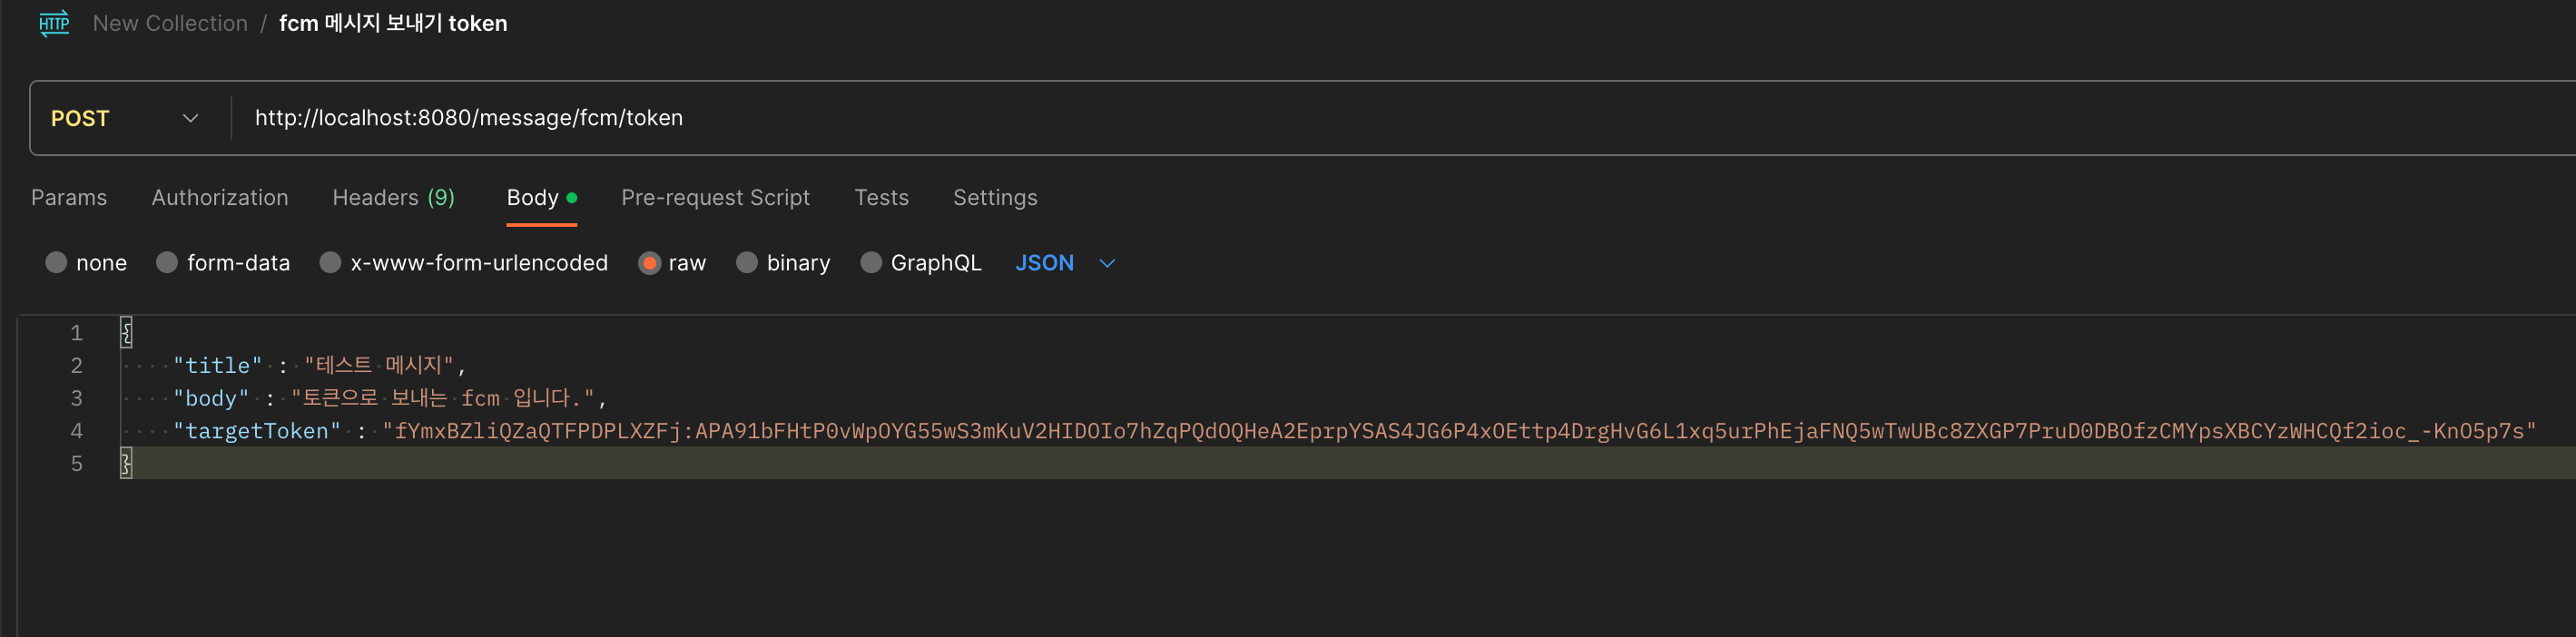
postman을 사용하여 api를 호출한다.
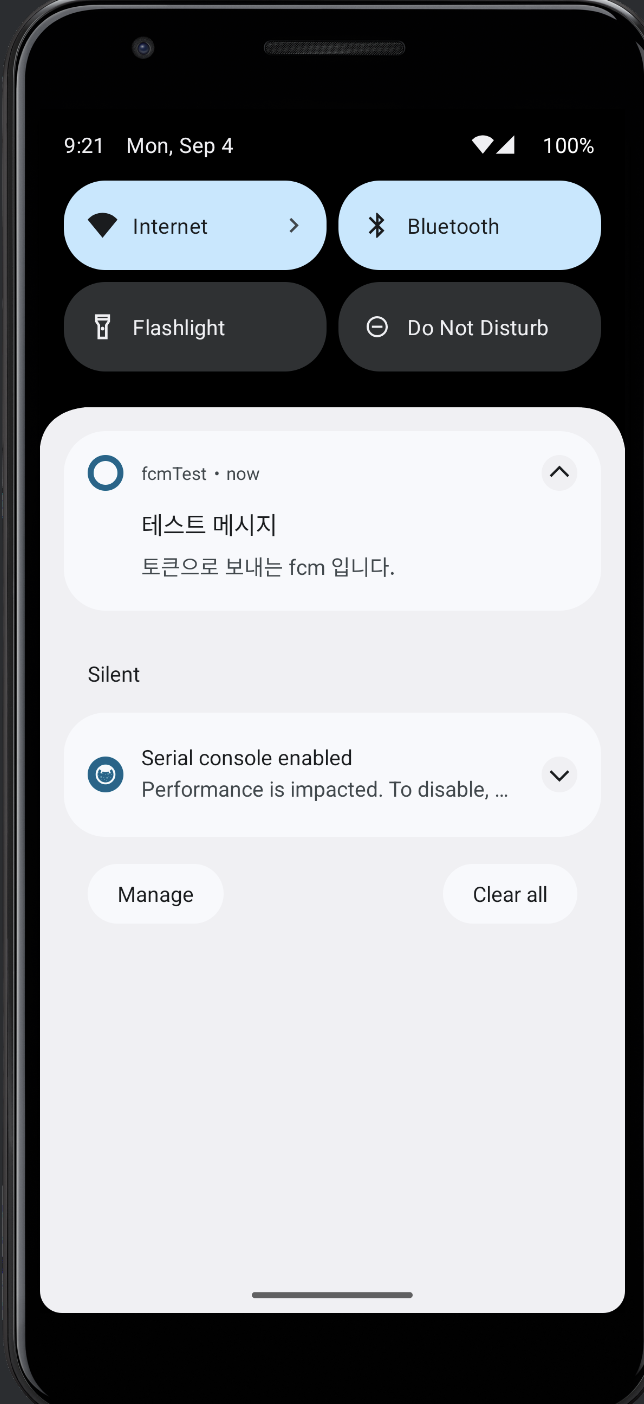
-
완료!
결론
Firebase Cloud Messaging을 사용하면 앱의 사용자들에게 효과적으로 푸시 알림을 전송하고 앱의 참여도를 높일 수 있습니다. 다양한 푸시 형식과 대상 지정 기능을 활용하여 사용자 경험을 개선하고 앱의 가치를 최대한으로 끌어낼 수 있습니다.
이로써 Firebase Cloud Messaging을 활용한 푸시 알림 전송 방법에 대해 살펴보았습니다. 앞으로 FCM을 사용하여 사용자와 소통하는 데 더 많은 가치를 창출하시기 바랍니다.